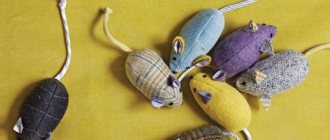
Animals that spend most of their time at home, in the warmth, are little adapted to weather changes. Therefore, it is necessary to prepare clothes for them that will keep them warm during a walk. As you know, clothing for animals costs a lot of money, and not everyone can buy it. After all, in addition to clothes, it is also necessary to buy food for the animal, vitamins, and appropriate care. Therefore, the best option would be to learn how to do such things yourself. For many beginners this may seem very difficult, but in reality it is not. Do-it-yourself clothes for cats are easy to sew and knit.
One of the most important tips for beginning needlewomen from sewing professionals is to be sure to follow the instructions provided in the master classes. In addition, clothes for cats, and especially for the short-haired Sphynx, can be made from a sock.
Features of choosing clothes for a cat
This especially applies to those owners who take care of their pet as a priority: They take them to the veterinarian, or attend various cat shows. In this case, the option of insulating the cat seems very reasonable, and in some cases even necessary.
This is especially true for certain breeds, whose genetics have determined their obvious life in warm countries. They suffer from a shortage of beautiful and insulating fur coats , or are completely naked, for example, like the Sphinx breed. The Devon Rex breed may also be on this list.
Clothing for a cat is also required in order to warm it in a cool room, especially if you live in a country house and your family of cats lives in the so-called summer kitchen.
In general, this problem has a solution. First of all, currently there are a large number of different stores where you can buy various models of clothing for cats for completely different purposes. But, you see, sometimes it’s more pleasant to process this or that material yourself, to make an idea that will be distinguished by its uniqueness and will be made with love.
The craft community can offer a variety of options for sewing clothes for an animal. Including for cats. But, this article will help you by helping you solve two main problems
- Make a beautiful and comfortable, warm suit for a cat.
- Do it quickly
In our case, there will be a simple solution that is perfect for home use, or just for the case of a summer kitchen, or a poorly heated room.
Crochet or knitting needles?
How to knit clothes for dogs.
Knitting dog clothes with knitting needles produces items that are more elastic, but also looser. There are interesting knitting patterns that use relief knitting with cables and braids.
Crocheted or knitted dog clothes decorated with ornaments look beautiful. The ornament can be knitted, or you can embroider patterns on a finished product. Items with knitted patterns are thicker and denser, they retain their shape well and warm well. But the technique of knitting an ornament requires some experience in knitting several threads at the same time. You can embroider an ornament on the finished product using a special knitted stitch, crosses or satin stitch.
In addition, clothes for small dogs are often decorated with decorative elements :
- sew strips of fur, natural or artificial;
- decorate the product with beads, beads, sequins;
- combine knitted elements with other materials: leather, fabric, suede.
Crochet allows the use of different techniques. The Moroccan technique of knitting clothes for dogs will give a dense knitting that holds its shape well. This technique is good for knitting blankets, capes and sleeveless vests with fasteners. The usual techniques will allow you to get beautiful clothes for dogs. Moreover, you can use a variety of leftover yarn.
The freeform knitting technique stands apart . To make models of clothing for dogs with your own hands using this technique, you first need to make a pattern in natural size, then knit the elements of future clothing - the so-called scrambles . Then the scrambles are sewn together with a needle or crocheted with a separate thread. Making freeform models will take a little longer, but all such clothes are completely unique and inimitable. Your pet will look like a real fashionista at the dog park.
Who needs extra warmth?
Representatives of the cat family have long been the owners of fluffy fur coats, which, in addition to external beauty, perform a number of important functions. They warm the mustachioed purrs, protect them from wind, moisture, and also help camouflage domestic predators.
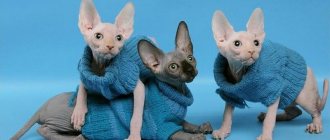
But not all tailed animals are endowed with thick fur. There are completely hairless or very short-haired breeds that are somewhat popular among people prone to allergies. However, such pets require special care. The fact is that their body temperature is always elevated, and in the cold season such cats need additional warmth, which is why their owners dress them up in original things.
Below is a list of cats that need extra warmth:
- The Sphynx is the most famous breed of hairless cat. Famous for its abundance of folds and wrinkles, as well as its large ears.
- Peterbald - the breed appeared thanks to crossing. The coat usually does not exceed 2 mm; some individuals have eyebrows and whiskers.
- Kohana - those with smooth skin, even if they want, will not be able to acquire hair, because they do not have hair follicles.
- Levkoy is another result of crossing breeds. They have funny forward-curved ears and an incredibly easy-going disposition.
- Bambino is similar in appearance to a dachshund due to its long body and short legs, which sometimes makes it difficult for him to jump to the desired place.
- The Elf is a new breed, bred in 2007. A characteristic feature is the ears curved in the opposite direction, which is why they resemble fairy-tale creatures.
- Minskin is a short-legged representative of hairless cats. Unlike other brothers, it has thick hair on its ears and head.
Summer minimalism
Cats only need casual outfits during the cold season. In summer there is no need for insulation, but there is a need for a stylish appearance. To add some flair to your cat's image, but not to overdo the outfit, you can make a cute accessory for your pet - a bow tie.
By the way! The textile highlight is also useful for photo shoots when the animal urgently needs to find a home or introduce the cat to the public.
Bow tie for a cat
For sewing you will need:
- thick fabric;
- collar (you can use a flea collar);
- needles, thread and scissors.
To ensure that the butterfly does not interfere with the cat’s enjoyment of life, you need to choose the appropriate size of the craft. Firstly, the product should not be too large. A bulky accessory will disturb the animal while eating and irritate it the rest of the day. Secondly, the craft should not have an intrusive smell, rustle or put pressure on the throat.
Step 1. Cut out a rectangle with sides 25 cm and 13 cm from thick fabric. It is also necessary to prepare a jumper for the butterfly. Its dimensions are 6x4 cm.
Tie details
Step 2. If the cat does not wear a collar, a strip of the same fabric will be useful for the tie, which will become a fastener. Its dimensions are 50x5 cm. A long piece of fabric is folded in half lengthwise and stitched. A fastener is attached to the ends of the tape.
Sew the main part for the bow tie
Step 3. A 25 cm piece is folded in half and stitched into a ring. Next, this part is folded so that the line is in the middle.
We sew a ribbon for a tie and sew on a hook
Step 4. A small jumper section is sewn into a miniature ring by hand, going around the main part. The butterfly is straightened and the jumper is secured in the middle of the craft with a hidden stitch from the inside. A part with clasps or a collar is inserted under the ribbon.
Video - Festive butterfly for a cat
Types of knitted clothes
You can make any model of clothing for your pet.
Using knitting needles and yarn threads, craftsmen can make socks, pullovers, overalls, and sweaters for cats. Knitted clothing differs in the material of thread used. It is important to select natural yarn so that the blouse does not cause discomfort to the animal and its illness. It can be sewn in the form of a skirt or pants, respectively, for different sexes of pets.
When choosing ready-made clothes, you need to take into account the size of the kitten. It should not be small, and you should not buy one that flops too much on the floor. Knitted clothes differ in density (one or two threads) and according to the pattern. The product is knitted using knitting needles or crochet. It has fasteners or is knitted in one piece. Socks are made with ties or not. Sweaters can also have a collar or an open neck.
We recommend reading: Automatic cat feeder - comparison of the 11 best automatic feeders: types, features, how it works
Why are cat paws trampling?
The cat performs “stomping” rhythmically, similar to how a kitten moves its paws over its mother’s belly while sucking milk. Such movements cause the flow of milk to the nipple. At the same time, the kitten also purrs loudly with pleasure, and in order for the milk received during sucking to be better digested, it begins to intensively secrete saliva. The cat can simply jump onto your lap, but without performing “stomping” movements. This is a sign that the pet has unlimited trust in its owner. Rumbling is a kind of ritual.
That's why the cat tramples on the owner's lap - this is how she begs for additional affection. If you constantly drive an animal off your lap, it will simply get offended and stop coming to you. But all cat breeders know about the vindictiveness of an offended cat - she is capable of starting to shit anywhere, and it will be quite difficult to wean her from this. Cats are offended because the mother did not drive the kitten away from her in such situations, and they expect the same from humans.
Another reason why cats may stomp on something soft, such as a pillow or sofa, is to get to bed. Still, cats by their origin are rather wild animals; in nature, they tried to create something like a nest. Now the cat sleeps on a soft rug, or even on the owners’ bed, but the “nesting” instinct remains.
A new hobby has appeared in my life - knitting for animals. The first cold weather on the street turned urban animals into real fashionistas and fashionistas. Apartment animals have become so cute in their new clothes! Although, the most important thing is that clothing for animals is not only a tribute to fashion, but, first of all, a means of protecting creatures from the cold.
A friend who has a cute cat asked me to knit a sweater for her pet. I had to tinker a lot before I found the right pattern and learned how to take measurements from four-legged animals.
After the sweater for the cat, two more sweaters were knitted, but for dogs (a friend recommended it to her friend). Now I'm waiting for Monday to take the dog's measurements and sew a vest for her. Perhaps one of the customers will be ready for a fur coat for the dog.
For you, I have prepared master classes on sewing and knitting clothes for animals. I hope that now your pets will not freeze in winter.
To knit a sweater for a cat you need:
- white half-wool threads (280mx100g) - pink threads (acrylic) (250mx100g) - knitting needles No. 3 - needle with a large eye
In order to knit this product you must be able to:
- knit knit and purl stitches - yarn over - pick up air loops - gather the product with a needle and large thread
We put 71 loops on the knitting needles with pink thread. We knit collar
with a 1x1 elastic band.
We divide the knitting into the tummy (25 stitches) and the back (46 stitches). Change the color of the thread to white and then knit the back and belly at the same time either from two balls, or by pulling the second end of the thread from the middle of the ball.
1 row
- belly: 25 knit stitches between which we place 14 yarn overs evenly - back: 23 knit stitches, 1 yarn over, 23 knit stitches.
2nd row
- back: 47 p. - tummy: elastic 1x1 39 loops
3rd row
- tummy: remove 1 p., 1 yarn over, elastic 1x1 37 loops, 1 yarn over, 1 knit stitch. - back: remove 1 stitch, 1 yarn over, knit 45 stitches, 1 yarn over, 1 knit stitch.
4 row
- back: 49 p. - tummy: elastic 1x1 41 loops
5-10 rows
We knit like rows 3 and 4.
Row 11 (start knitting armholes)
- tummy: bind off 3 loops, elastic 1x1 44 loops - back: bind off 3 loops, 52 p.
Row 12
- back: cast off 3 stitches, purl 49. - tummy: close 3 loops, elastic 1x1 41 loops
Rows 13-27
We knit in a straight line according to the pattern.
28 row
- tummy: dial 3 air. loops further according to the drawing - back: dial 3 air. loops further according to the picture
Row 29
- back: dial 3 air. loops further according to the figure - tummy: dial 3 air. loops further according to the picture
We knit from the collar 13.5 cm. We finish the tummy by knitting 2 cm with a yellow thread with a 1x1 elastic band.
We knit the back to a length of 18 cm. We begin to decrease the loops. To do this, we knit 2 loops together at the beginning and end of each front row. We knit the purl rows with purl loops. We knit the back to a length of 24 cm, after which we close the loops.
We sew the details of the product with a needle with a large eye.
We knit a 1x1 strip with a pink thread and an elastic band equal to the length of the edge of the back.
Sew the knitted strip to the edge of the back.
We knit the sleeves.
To do this, cast on 40 loops with pink thread. We knit 1 cm with an elastic band 1x1. Change the color of the thread. We make one yarn over at the edges of the front row and knit another 1 cm. Again we make one yarn over in the front row and knit another 2.5 cm sleeve. We knit a second sleeve.
We sew the edges of the sleeves and sew them to the sweater.
I decided to decorate the sweater with a heart so that no one would have any doubt that the product was knitted with love for the customer’s pet.
This is the sweater I made for the cat.
What do you think about clothes for animals?
To receive the best articles, subscribe to Alimero's pages on Yandex Zen, VKontakte, Odnoklassniki, Facebook and Pinterest!
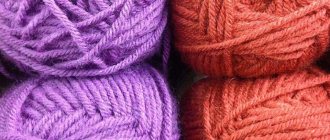
Choosing a color for a cat sweater
Do-it-yourself clothes will be very useful for a cat, because they will be exactly the right size. It is equally important that the new item can include not only design, but also colors. Then you can easily create a sweater based on the character of your pet.
Active cats will like bright and rich colors. Slower and more measured cats will suit calmer pastel colors.
In this article you will learn how to create several patterns of sweaters for cats with your own hands. A warm sweater is very important for sphinxes, since their respiratory diseases are not so easy to treat.
Some tips on how to train cats to wear clothes:
- This must be done carefully and definitely not against the will of the pet.
- Things should be comfortable, not tight, but also not dragging along the floor.
- You can entice him to the sweater using food or a special cat spray with a catnip scent (found at a pet store).
Important! The sweater must be made of natural and non-electric materials.
We crochet hats for cats with a pompom, mohawk, bow - patterns
Today in our selection you will find models of sweaters for dogs from Garnstudio. Why not pamper your tailed pet and knit a dog sweater? Mine doesn’t seem to be, but I never suggested that she wear a pink knitted jacket for a walk. You can embroider something or sew on an applique.
We also have video knitting lessons and regular, standard descriptions for free on how to create knitted clothes for your pets with your own hands. Knit 23 cm, then divide the loops into three parts according to:
Tejer Beautiful men's and women's models of knitted items. The magazine contains material for all skill levels, each model is accompanied by large and colorful photographs from different angles, simple and clear instructions and diagrams. A few years ago she learned to crochet, and now she has her own craft of knitting hats for cats.
Yarn and hook
For cats, you need to choose only natural yarn. It should not be electrified. Silk and wool fit this description. From plant origin, you can also pay attention to cotton. Only it is not so warm that you can knit sweaters for pets only from it. Unless there are some demi-season options.
As for color, you can choose a variety of combinations, but experienced pet owners strongly advise against bright shades. This can noticeably distract the cat from its typical routine. And the first fitting can simply scare your pet and instill fear in clothes. To prevent all this from happening, it is better to pay attention to calmer tones.
Bright elements can be left for the back of the product. The hook is selected in this case only depending on the thickness of the thread. The product should be strong, durable and tight.
If some crochet patterns somehow allow larger hooks for looseness, then it would simply be inappropriate here. The cat should not be disturbed by excess fibers and threads.
For beginners, how to cast on the first loops on a hook:
Set of first loops
Set of 1st and 2nd loops on hook
Crochet 1st chain
Dress for the sphinx
You can sew an original outfit for a cat using a simple pattern. An example of this will be a wonderful dress created from just two parts.
Step-by-step instructions for sewing a simple sundress
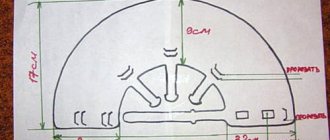
First, using the measurements taken, you will need to cut out the main part. To do this, the fabric is ironed and folded with the right side inward. A pattern is drawn with chalk on the resulting “sandwich” of fabric. In the proposed example, the back length is 26 cm. This value can be changed depending on the required length of the dress. The value equal to 17 cm in the photo indicates the length of the product on the stomach. The first fitting will help determine the length, so the fabric is cut with a margin, and later the excess is cut off.
Pattern of a sundress for a cat
Step-by-step instructions for making a dress for the sphinx consist of several simple steps:
- seam allowances are added to the part and the pattern is cut out;
- by dividing the folded fabric, you get a dress detail with two cutouts for paws. Having attached the part to the animal, mark the required length and adjust the dress;
- the armholes of the sleeves and the bottom of the product can be edged with tape or hemmed by machine, turning the fabric 3 mm;
- the part is sewn together. The seam should be on the front of the product;
- You can use cuffs from any sweater or a strip of elastic fabric as the neckline of the dress. The rectangle of material should have a length equal to the circumference of the cat's neck. The strip is sewn into a ring and folded in half, after which it is attached to the product.
The dress can be decorated in any way you like. For example, create an applique from fabrics or sew on buttons and other decorative elements.
Video - Denim collar-vest with removable wings for a cat
How to knit with your own hands?
You can read the description of a knitted sweater pattern on websites or in printed magazines. Initially, you need to decide on the type of product, find instructions and prepare the tool. The materials you will need are yarn and knitting needles. To sew the finished elements, you will need a needle with a thick eye. The blouse starts at the bottom of the front. The diagram must include holes for the paws and tail of the fluffy. Sweaters come with or without sleeves; to do this, just tie the collar separately.
Clothing should have convenient fasteners so that the cat can walk and lie in it comfortably. For a medium-sized adult cat, 71 loops are enough, but individual measurements and calculations must be carried out before the process begins. To make a product, you need to be able to knit purl and knit stitches, make yarn overs and chain stitches. If a person does not have the appropriate skills, then a knitted blouse may not work out.
Pink and blue dress
The white and pink dress is made with needles No. 2.5 from yarn, which contains viscose and acrylic, with a density of 300 m per 100 g. The top is made of white threads, and the skirt is pink. It is decorated with a pink heart on the back and fastens with four buttons at the front.
The blue dress is made from the same threads, but only blue for the main part and white for the trim. It also fastens with buttons. But if in the pink model the skirt was knitted, then in this one it is crocheted.
I hastened to publish this article because site reader Marina was looking for knitting patterns for Sphynx cats with descriptions and patterns. And, after looking through all my folders, I found these models. If I find any more, I will add them to this article. By the way, if you also have any knitted clothing patterns for pets, share them with our readers!
Sweater with pattern
Before you start knitting a sweater, take a tape measure and measure the volume of your pet's neck and the approximate length of the sweater. When you make a cutout for the neck, do not make it small, otherwise the cat will be uncomfortable.
To work you need:
- knitting needles number 3.5
- circular needles number 3.5
- yarn 100 grams (wool or 50/50 with acrylic)
- needle
We recommend reading: Shepherd doghouse: examples, optimal sizes, making it yourself
Let's get started
The main pattern is stockinette stitch. Knit over knit, purl over purl. Knitting density: 16 loops / 20 rows = 10 / 10 centimeters. We knit in 2 threads.
Let's start work from the front. We put 25 loops on the knitting needles and knit them with an elastic band, knit 1. 1 purl. 3 centimeters. Then we continue working with stockinette stitch to a height of 10 centimeters. The pattern has it all. 13 centimeters from the edge, to form sleeves, we cast on 18 loops on both sides of the fabric (a total of 61 loops on the knitting needles). We knit 10 centimeters exactly with the front ones and for the neckline we close off 21 loops in the middle. (20 loops remain on the knitting needles). In the next row, add 28 stitches above the closed stitches. (There were 68 loops on the knitting needles). Knit another 10 centimeters in stockinette stitch with an even fabric and bind off 18 stitches on both sides. (There are 32 loops on the needles). After another 10 centimeters, elastic 1/1 (k1, p1). Knit an elastic band 3 centimeters. Close the loops without tightening them too much.
Assembly
Sew the side seams and sleeve seams. Making a neckline: cast on loops on circular knitting needles and knit as many centimeters as you want for the collar. You can make the collar high, or you can just make it a few centimeters. We knit with a 2/2 cm elastic band. The main thing is that the cat is comfortable.
The video provides detailed information on how to crochet a sweater for a dog, but this sweater is also suitable for our beloved Sphynx .
how to crochet a dog sweater Watch this video on YouTube
How to crochet a toy
Novice authors prefer crocheted toys with patterns and descriptions. Craftswomen post many free master classes that allow you to create a magnificent creation. Products can be presented as a gift, depict symbols of love or the upcoming New Year. It’s more pleasant to give homemade items as a gift than to buy similar ones from a store.
Small crochet toys for beginners
There are various patterns of knitted toys, painted with detailed photos. Beginners may be interested in a simple Kolobok or Smiley. To make it, you need to follow a step-by-step technology. The following conventions apply:
- VP, VOP – air loop;
- PS – half-column;
- SBN, STBN, stb.n, BN – single crochet;
- 2 in 1 – 2 single crochets knitted together;
- 2 together - 2 elements are connected with a single crochet.
Knitting pattern for a kolobok (smiley):
- Dial 2 VP, from the second tie 6 BN.
- Second row - knit 12 elements 2 in 1.
- Third row – 1 BN, 2 in 1 – repeat 6 repeats. Subsequent ones (4-10) are knitted with an increase in BN by 1 pc.
- From the 11th to the 20th sequence, only BN are knitted, the twenty-first - 8 RLS, 2 together.
- Then they begin to reduce the number of RLS to make a ball - there will be 28 sequences in total. Row 29 – 2 together – knit all the loops like this.
- Decorate the face, decorate with yarn hair, stuff with filler.
Small crocheted toys can be made in the shape of a ladybug. Master class on knitting it:
- Using a red thread, cast on 2 VPs, knit 5 sc from 2 elements.
- Start each sequence with a VP lift, in the second, knit 2 BN from each element, on the third, 2 BN in the loop of the previous one, 1 BN. On the fourth, 2 sc, 1 sc in 2 elements, alternate.
- From the fifth to the seventh - sc, embroider crosses with black thread, on the eighth, ninth, knit 2 in 1 behind the back loop. Stuff with padding polyester, sew up.
- Knit the head with black thread: similar to the body, only there will be only 3 sequences. Sew it to the body, knit the horns.
How to crochet amigurumi toys
Among craftswomen, knitted toys with patterns and descriptions of amigurumi are especially popular - these are Japanese products that personify living or inanimate nature. By amigurumi we mean that the bears and bunnies will turn out cute and small in size. Soft toys are also knitted with knitting needles, but more often crocheted. The designations indicated above are used, plus new ones:
Description of the classic knitted cat:
- Cast on chain VP and 1 lifting loop, knit 9 BN, 3 elements in 1, turn, knit 8 and 2 BN from 1, SS.
- GP, 22 BN.
- 10 BN, P, repeat.
- 3 BN, P – continue.
- Cycles 5-9: 30 BN.
- 3 RLS, U.
- 2 RLS, U.
- 1 sc, U. glue the eyes.
- Neck: 2 sc, p, 2 cycle – 3 sc, p.
- Body: 20 sc, row 2 – 4 sc, p.
- Tail: 6 sc, 5 sc with P repeat, 6 sc, cycle 2 – 5 sc, 6 sc with P repeat, 5 sc. At the end, cast on a chain of 13 VP, starting from the second loop - knit 12 SC.
- Cycles 19-21: 30 single crochets.
- 3 single crochets, U - alternate, in subsequent cycles decrease by 1 single crochet.
- Pull the ears, stuff them, decorate the cat's face. You can also knit a separate pillow for it.
The hedgehog is knitted like this:
- Using beige yarn from 6 VOPs, knit BN, make 6 P.
- The third cycle is knitted 1 BN, 1 P, up to the tenth - increase by 1 SC.
- From cycles 11 to 14, knit 60 stb.n., then from 15 to 20, knit with brown yarn. From the 21st cycle, knit 8 stb.n., 1 U, in each subsequent decrease by 1 stb.n., fill, make 6 U.
- Embroider a muzzle, glue on eyes, tie ears and paws with rings, decorate with flowers and beads.
Crochet dolls with patterns and descriptions
Children love things “from mom.” Crocheted toys with patterns and descriptions, especially if they are dolls, will allow you to captivate your child with a handmade fairy tale. Figures help develop imagination and give sincere emotions from contact. Give your children an original product made according to the free master class on making a girl doll (there will be filler inside, you will need wire for the frame). Description of work:
- Using a flesh thread, cast on 2 VOPs, close them in a ring, and tie the face in the form of a ball according to the steps described above.
- Knit the torso by analogy, arms and legs in the form of long cylinders with single crochets to the required length.
- The shoes consist of semicircles similar to the balls from the first pattern, only increases are made, and then the knitting is closed. A backpack is knitted, you can sew clothes based on photos chosen from the Internet.
- The doll is decorated with a beret, hair, and a face.
- You can make a schoolgirl doll with a backpack, a diary, and other set of parts.
If you need to knit a boy doll, you can make a cool gnome or clown:
- The principle is used by analogy with a girl doll, only the boy turns out to be smaller and more flattened. The colors are more strict.
- The gnome is decorated with a pointed cap, a beard, and the nose and ears are knitted separately.
Crochet appliqués are an easy way to add a unique touch to an ordinary children's cotton T-shirt. Crocheted appliqués for children are also useful if you need to disguise a hole or an unpleasant stain on clothes.
This is such an original and cute way of decoration and restoration. With its help, you can update not only children's things.
Sweater with a pattern
You can knit a gorgeous sweater with a pattern for your pet. It will be more complicated than the previous one, but it will look very interesting. It’s up to you to decide which sweater to choose.
For this sweater we will need:
- knitting needles number 3.5
- yarn 100 grams (light and dark) wool or 50/50 with acrylic
- needle
Knitting density 16 p. / 22 rows = 10/10 cm. Cast on 48 loops with blue thread and knit with a 2/2 elastic band. Switch to a white thread and knit 5 cm in stockinette stitch. Next, start knitting the pattern according to the pattern:
Scheme
At the same time, knit the holes for the paws: knit 7. loops, cast off 6 loops, knit 22. loops, close 6 loops. 7 persons. loops Knit the resulting 3 parts separately for the next 5 centimeters, then connect them by casting 6 loops above the closed loops. After 20 centimeters from the neck, start decreasing (3 times 3 loops on both sides). Close off the remaining stitches after finishing the pattern. Along the edges of the holes for the cat's paws, cast on 20 loops with a dark thread and tie 4 centimeters with a 2/2 elastic band. The sweater is ready.
Crochet applique. Required
- AUNTLYDIA'S® ClassicCrochetThread No. 10 Cotton Yarn: 1 skein of black, No. 12 (labeled as thread A) and pink, No. 332 (thread B in description).
- You will also need metallic yarn AUNTLYDIA'S® FashionCrochet No. 5: 1 skein of silver color, No. 410S (thread C).
- Hook diameter 3mm
- 2 green buttons or snaps with a diameter of 19 mm
- Needle
- Sewing thread
Baby crochet applique size
Types of loops when crocheting the Cat applique
- Air loop
- single crochet
- 2 single crochets together: yarn over the hook, insert the hook into the next loop and pull the hook out of the loop - there are 2 loops on the hook; throw a thread onto the hook, insert the hook into the next loop and pull the hook out - there are 3 loops on the hook; Yarn over the hook and pull the hook through all 3 loops on the hook. Voila, the first 2 single crochets are done together!
The main principles of sock sewing
Despite the very wide selection in stores, many owners prefer hand-made sewing, and there are a number of reasons for this.
First, you know what kind of fabric you are using. It is very important that it is natural to avoid allergies or irritation to the sensitive skin of the purr.
Secondly, sock cat clothes are quite simple. There are no elements in it that will hinder your pet’s movements or allow you to get confused in them. Do not forget that cats are playful and active animals, and tight clothing will not allow them to spend energy as they should.
Therefore, if you decide to make clothes for your cat with your own hands from a sock, you should make sure that the product meets the requirements described above, and you should not weigh it down with unnecessary accessories. In addition, be sure to check the elastic - it should not be too tight so as not to squeeze the animal’s neck. Having made sure that all points have been met, you can safely get to work.
Crochet applique patterns descriptions
Fold 2 threads A together and make a chain of 25 chain stitches.
Row 1: knit all the loops behind the back wall; single crochet in the 2nd chain stitch from the hook and in all subsequent chain stitches = 24 stitches.
Row 2: Work 1 chain stitch. pet., turn, [column. without. nak. in the next loop, 2 columns. without. nak. to the next loop] – 2 times, 1 column each. without. nak. in next 16 stitches, [2 single crochets in next stitch, 1 single crochet. without. nak. to the next loop] - 2 times = 28 loops.
Row 3: Work 1 chain stitch. pet., turn, knit 1 stitch. without. nak. in each of the following loops to the end.
Row 4: Work 1 chain stitch. pet., turn, [1 st. without. nak. in the next loop, 2 columns. without. nak. to the next loop] – 2 times, 1 column each. without. nak. in the next 20 stitches, [2 dc. without. nak. in the next loop, 1 stitch. without. nak. to the next loop] – 2 times = 32 loops.
Row 5: Work 1 chain stitch. pet., turn, knit 1 stitch. without. nak. in each of the following loops to the end.
Row 6: Work 1 chain stitch. pet., turn, [1 st. without. nak. in the next loop, 2 columns. without. nak. to the next loop] – 2 times, 1 column each. without. nak. in the next 24 stitches, [1 st. without. nak. in the next loop, 2 columns. without. nak. to the next loop] – 2 times = 36 loops.
Rows 7-18: Chain 1. pet., turn, knit 1 stitch. without. nak. in each of the following loops to the end.
Row 19: Work 1 chain stitch. pet., turn, [1 st. without. nak. in the next loop, 2 columns. without. nak. together] – 2 times, 1 column. without. nak. in the next 24 stitches, [2 sts. without. nak. together, single crochet in the next loop] – 2 times = 32 loops.
Row 20: Work 1 chain stitch. pet., turn, knit 1 stitch. without. nak. in each of the following loops to the end.
Row 21: Work 1 chain stitch. pet., turn, [1 st. without. nak. in the next loop, 2 columns. without. nak. together] – 2 times, 1 column. without. nak. in the next 20 stitches, [2 dc. without. nak. together, 1 column. without. nak. to the next loop] – 2 times = 28 loops.
Rows 22-31: work 1 chain stitch, turn, knit 1 stitch. without. nak. in each of the following loops to the end.
Row 32: Chain 1, turn, [1 stitch. without. nak. in the next loop, 2 single crochets together] – 2 times, 1 single crochet in the next 16 loops, [2 double crochets. without. nak. together, single crochet in the next loop] – 2 times = 24 loops.
Row 33: Work 1 chain stitch. pet., turn, knit 1 stitch. without. nak. in each of the following loops to the end.
Row 34: Work 1 chain stitch. sts, turn, [single crochet in next stitch, 2 dc. without. nak. together] – 2 times, 1 single crochet in the next 12 stitches, [2 dc. without. nak. together, single crochet in next stitch] – 2 times = 20 stitches.
Row 35: Work 1 chain stitch. pet., turn, knit 1 stitch. without. nak. in each of the following loops to the end.
The first ear in the Crochet Cat applique
Row 36: work 1 chain stitch, turn, 1 stitch at a time. without. nak. in next 8 stitches, leave remaining stitches undone = 8 stitches.
Row 37: Work 1 chain stitch. pet., turn, knit 1 stitch. without. nak. in each of the following loops to the end.
Row 38: Work 1 chain stitch. pet., turn, skip the first loop, 1 stitch. without. nak. in next 5 stitches, 2 single crochets together = 6 stitches.
Row 39: Work 1 chain stitch. pet., turn, knit 1 stitch. without. nak. in each of the following loops to the end.
Row 40: Work 1 chain stitch. pet., turn, skip the first loop, 1 stitch. without. nak. in next 3 stitches, 2 single crochets together = 4 stitches.
Row 41: Work 1 chain stitch. st., turn, knit 1 single crochet in each of the following loops to the end.
Row 42: Work 1 chain stitch. pet., turn, [2 st. without. nak. together] – 2 times = 2 loops.
Completion: knit 1 stitch. pet., turn, knit 1 stitch. without. nak. in each of the following loops to the end.
Second ear in Crochet Cat applique
Row 36: Leave the next 4 stitches undone in Row 36, join a strand of yarn and work 1 chain in the next stitch, then single crochet in the same stitch, work 1 single crochet in the next 7 stitches = 8 stitches.
Rows 37-42: Work in the same way as you did for the first ear of the cat appliqué. Do not cut the thread.
Crochet baby applique border
Do 1 air. st., make a single crochet and then knit with single crochets, distributing them evenly around the entire applique of the Cat’s head. Finish the knitting with a connecting stitch by working it into the first single crochet.
Cat nose crochet applique
Using a thread of color B in 2 folds, make 8 air loops and knit like this:
Row 1: knit all the loops behind the back wall; single crochet in the 2nd chain loop from the hook and then 1 single crochet in each chain loop = 7 loops.
Row 2: Work 1 chain stitch. sts, turn, skip first stitch, work 1 single crochet in next 4 stitches, 2 single crochets together = 5 stitches.
Row 3: Work 1 chain stitch. sts, turn, skip first stitch, work 1 single crochet in next 2 stitches, 2 single crochets together = 3 stitches.
Row 4: Work 1 chain stitch. sts, turn, skip first stitch, 2 single crochets together = 1 stitch.
Edging the nose detail for a knitted Cat applique
Knit 1 stitch. pet. and then tie all sides of the part with single crochets. Fasten the loop, cut the thread.
Crochet appliques for children. End of work
Sew buttons in the shape of eyes onto the finished applique, and sew on a knitted nose. Embroider mustaches and lips using metallic thread. Sew the applique onto the T-shirt.
© Translation from English Nadezhda Bolgova
Popular articles:
DIY wedding bouquet from brooches. First, knit an elastic band 3 cm wide, then with stockinette stitch to the armhole of the hole for the front legs. Author's workshop of Irina Chadova Jul 22, at 8: Dry food 1st Choice “Adult”. Knitscene Magazine for knitting collections of knitted clothing and accessories for women and men. The publication offers readers a lot of ideas for products that can be knitted on almost any knitting machine or by hand knitting. To knit a neckline, first knit the loops of one shoulder, bind off the loops on the 5 cm pattern. Atelier is the only applied magazine for those who create clothes that publishes a unique cutting technique using the universal “M. The first rows are knitted with an elastic band - this will be the bottom of the product, and the rest - with stockinette stitch. Sewing and cutting “Sewing and cutting” is a magazine for those who love to sew. Müller and Son" Magazines on the website: Wedding embroidery with decorative stitches for a jewelry box. Moscow, Serebryanicheskaya embankment, Almost every issue presents more projects with descriptions, diagrams and patterns.
For example, a DIY dog vest will help your pet not catch a cold on rainy and windy days of autumn. Knitted clothes for small dogs..
How to take measurements of a cat?
Before starting to sew clothes from a sock for a sphinx or other similar animal, some owners take measurements from it. This will make the sweater more comfortable. There are three main measurements:
We recommend reading: Protective collar for cats (instructions and how to make it yourself)
- neck girth;
- body girth (behind the front and in front of the hind legs);
- back length (from neck to base of tail).
Additionally, you can remove the volume of the paw if you want to add sleeves to the sweater. When taking measurements, it is very important that the animal is calm and standing on all fours. If you are not sure that you can handle it yourself, you should seek help from members of your household who will help calm the mustachioed one.
If the cat categorically refuses to have measurements taken, you should not torture the animal or cause it stress. It's easier to make a sweater using the standard pattern.
The tuxedo
You can sew a wonderful tuxedo for your cat as a stylish accessory. Using a simple pattern, you can make a jacket-cape that will not hinder movement and will give your pet comfort.
For work you will need the following materials:
- white fabric - an old T-shirt;
- black material - any piece of cotton of a suitable size;
- a piece of red felt;
- Velcro for fasteners;
- scissors, chalk and other tailor's little things.
Necessary materials for work
Step 1. To determine the length of the tailcoat, measure the length from the neck to the tail of the cat. A pattern of a white element is cut out of white fabric in accordance with the measurements. For convenience, use a fabric folded in half. You will need 2 of these parts.
Cutting out the details for the tailcoat
Step 2. The first white piece, folded in half, is applied to the black fabric. The dark element should not be the same size as the white one, as the jacket will end up being shorter than the shirt.
Cutting out parts from black fabric
Step 3. You can choose any shape of the vest itself. The main thing is that it is symmetrical.
Combining the details
Step 4. A tie is cut out of red fabric, and a collar is made from a white scrap.
Cut out and apply the tie and collar
Step 5. Next, the parts are sewn together in the following order:
- a tie with a collar is attached to the base;
- a vest is attached to the upper white part;
- the protruding part of the tie is sewn on top;
- Velcro is sewn to the elongated neck so that the upper part tightly covers the lower one.
Sew the parts and attach Velcro
Step 6. The future tailcoat will be attached to the pet’s neck and stomach. As a fastener, cut out a rectangular strip of black color and add 0.5 cm to its edges.
Making a fastener
Step 7. The resulting strap is sewn between two white parts of the tailcoat. The length of the belt is determined by the circumference of the pet's chest. It is best to adjust this length during fitting. The edge of the cut belt is lined up. Strong Velcro is sewn onto one end of the tape.
Sewing the tailcoat and fastening
Step 8. The second Velcro piece is sewn on the opposite side of the white piece inside out, as shown in the picture. The fastened strap will go around the animal's chest. To make the tailcoat look stylish, its edge can be ironed and stitched 1 mm from the edge.
Ready-made tuxedo
The finished tuxedo will serve as an excellent cape for a freezing Devon Rex.
How to make clothes for a cat from a sock?
If you want your pet to be comfortable in winter, then you need to have a couple of warm clothes in reserve. In order to make clothes for a cat from a sock, you need to prepare only three things: a warm sock, scissors and chalk. Next, based on the measurements taken, do the following:
- Mark the required length on the sock using measurements or simply placing the sock against the cat. Draw a cut line with a small margin.
- After ironing the sock, cut off the excess.
- Now you need to mark the slots for the paws. If you don't have measurements, make cuts in the middle of the sock to create a wide collar. It is very important that the holes are symmetrical.
- After marking them, make cuts. Afterwards they can be overlocked with an overlocker or by hand.
- If desired, you can make sleeves from the remains of the sock by sewing them to the slits.
- You need to try the finished sweater on your pet and make sure that it is not too tight for him. To do this, place your palm under the sock. If it fits in freely, then the blouse fits the cat. Do the same with the neck.
Loop calculation
To calculate the density, you need to cast on 20-30 loops on the knitting needles and knit about 10 cm with the pattern chosen for the sweater. The resulting sample should be steamed with an iron or moistened and dried properly so that the sample takes on its final form and shape. Afterwards, calculations are made of the number of loops per 1 cm of fabric, as well as the number of rows per 1 cm of height. Record your results.
Pros and cons of clothing made from socks
Like any clothing, cat sweaters made from socks have a number of advantages and disadvantages. The main advantage is that the product is sewn quickly and easily. Even the lack of measurements is not a problem for creating such clothes. Another undoubted advantage is that everyone has warm terry socks, so in case of emergency it will not be difficult to get material for sewing. And, of course, another plus is the convenience and comfort of such a sweater for your pet.
As for the disadvantages, the main thing is the fragility of these clothes. But, considering that you can make clothes from a sock for a cat in just an hour, this drawback does not seem so significant. Another not-so-pleasant point is that such a jacket may not be suitable for large animals. In such cases, you can use your old sweater.
Instinctive behavior
Cat trampling begins when a person takes a sitting or lying position. If the cat is in a good mood, it will immediately jump onto your lap and begin the “massage.” Most owners like it. But you need to keep an eye on the animal, because after some time the movements become a little more intrusive, and the claws begin to dig into the body.
This behavior is instinctive for a cat. Regardless of how many years a cat has lived in the world, the pet still remains partly a kitten. Unlike her homeless relatives, she does not have to worry about food, shelter, or anything else; she does not have any worries, so she cannot fully grow up. And the kitten needs a mother, so the cat looks for a replacement for her in a person.
The kitten goes to sleep only next to its mother. An adult cat also lays down next to a person. And he jumps on his knees as soon as the owner sits down. If they also start stroking her, she will perceive it as if licking has begun.
Quick clothes for a cat
The fastest way to make clothes is from children's fleece pants. Cut one pant leg and make holes in it for the paws. This material does not crumble or crumble, so you can do without processing the cuts.
Sources
- https://svoimi-rukami-club.ru/%D0%B1%D1%8B%D1%81%D1%82%D1%80%D0%B0%D1%8F-%D0%B7%D0%B0% D0%B3%D0%BE%D1%82%D0%BE%D0%B2%D0%BA%D0%B0-%D0%BE%D0%B4%D0%B5%D0%B6%D0%B4%D1 %8B-%D0%B4%D0%BB%D1%8F-%D0%BA%D0%BE%D1%82%D0%B0-%D0%B8%D0%B7-%D0%BD%D0%BE %D1%81%D0%BA%D0%BE%D0%B2/
- https://handskill.ru/461369a-kak-iz-noska-sdelat-odejdu-dlya-koshki-raskryivaem-sekretyi
- https://InfoKotiki.ru/soderzhanie/prisposoblenia/kak-vyazat-odezhdu-dlya-kota.html
- https://tkaner.com/odezhda/sviter/sviter-dlya-koshki-kryuchkom/
- https://koteko.ru/kak-svyazat-odezhdu-koshke
- https://chistokot.com/neskol-ko-byistryih-variantov-odezhdyi-dlya-koshki/
[collapse]
Jumpsuit finishing
Steam the straps of the overalls with an iron and hem them.
Sew buttons and a bow to the overalls. The overalls for Basik the cat are ready.