With your own hands
It is not always possible to quickly select a ready-made medical collar of the required size and dimensions. In addition, it is possible that a protective accessory is needed urgently, but there is no time to search and purchase. There is only one way out - to make an E-collar with your own hands.
We will look at the most popular models of homemade collars and tell you how to make them at home.
The most popular materials for this barrier protection product are:
- cardboard;
- lightweight plastic;
- plastic bottle;
- textile.
Cardboard
The simplest and easiest way to make a collar for a cat.
A cardboard structure can be built in a hurry when an animal urgently needs protective equipment. The model is not suitable for long-term use, but it can cope with its task within a few hours. In the future, industrial designs or collars made of other materials should be used: plastic, soft fabric.
To make your own cardboard collar you will need: cardboard, tape and lace.
How to make a cardboard collar:
- Take thick cardboard. Boxes from household appliances or shoes will do.
- Take measurements from the cat - neck circumference (measurement No. 1) and neck length from the collar to the tip of the nose (measurement No. 2).
- Draw a cone on the cardboard with the length of the inner circle equal to the circumference of the neck (+2.5 cm). The width of the product will be equal to the second measurement (+2.5 cm).
- Cut out the collar according to the drawn pattern.
- The edges of the cone must be treated with tape.
- Using a lace, fasten the parts of the cone.
- For ease of wearing, make loops for the collar.
You can use a stapler, sticky tape or tape to secure the edges of the cone.
A cardboard collar is convenient to use for flea treatment of an animal.
Video
Made from lightweight plastic
A more solid and reliable design is made from lightweight plastic. Such a collar is not inferior in its characteristics to finished plastic products.
To make a plastic collar you will need: a stationery folder or a flexible cutting board, tape or wide adhesive tape, a stapler and a textile fastener (Velcro).
How to make a collar from lightweight plastic:
- The pattern for the product is made in the same way as for a cardboard model.
- A cone is cut out from a stationery folder or cutting board according to the pattern, adding 2-3 cm along the edges to adjust the size.
- Sharp edges are treated with adhesive tape or tape.
- The textile fastener is attached to the plastic edges of the cone using a stapler.
To make it easier to fix the product on your cat, you can improve the design by cutting or constructing loops for the collar.
Video
From a plastic bottle
Models of Elizabethan bottle collars are popular among cat owners - this material is found in every home. Bottle plastic is transparent, flexible and durable - collars made from them will last a long time.
For a plastic bottle collar you will need: a water bottle, tape, adhesive tape or string.
How to make a collar from a plastic bottle:
- Choose a transparent bottle of the appropriate size.
- On the side of the neck, a marker marks a diameter equal to the circumference of the pet’s neck.
- The neck is cut off and the length of the cat’s head is measured (measurement No. 2).
- The rest of the bottle is cut along the marked line.
- So that the product can be put on a cat, the cone is cut lengthwise.
- The lacing is threaded along the cutting line into pre-made holes or a Velcro fastener is attached using a stapler.
To prevent the animal from injuring itself, all sharp cuts are sealed with adhesive tape or tape.
Soft fabric collar
Not all cats will like hard plastic and cardboard structures. Capricious pets will like soft fabric products more. The collar is sewn from cotton fabric to minimize possible allergic reactions. Linen or cotton is best suited for this purpose.
To create a more dense structure, a cardboard or plastic base is placed between strips of fabric, and the collar is stuffed with padding polyester or cotton wool.
The simplest collar can be sewn using the pattern that was used for the cardboard and plastic versions. Don't forget to add 1.5 cm at the seams. Along the cut line, the edges of the collar are secured with adhesive tape.
Collar made from scrap materials
An interesting video about how to quickly make an Elizabethan collar from disposable paper plates.
What to look for when choosing
When buying a protective collar, focus on its size, length, and the material from which it is made.
Manufacturers, as a rule, produce collars made of plastic. This is the most inexpensive model. A reinforced collar can cost a little more - it is trimmed along the edge with an elastic band that protects the structure from breakage. A plastic collar in the shape of a semicircle is wrapped around the cat’s neck and fastened with “tabs” that are pushed through the holes on the opposite edge. Its advantage is that, thanks to the transparency of the plastic, the cat retains its usual view.
If you purchased a plastic collar without elastic around the outer edge, you can reinforce it yourself. To do this, cover the edges of the collar with a regular adhesive plaster. This will protect the upper part from the consequences of collisions with external objects and make the lower part (adjacent to the cat’s neck) softer.
If you want your sick pet to feel more comfortable, and you plan to wear the “protection” for a long time, then you can look for a collar made of soft fabric or non-woven water-repellent material. The shape of such products is a cone or a lifebuoy. The latter option is reminiscent of the pillows that passengers use for comfortable sleep on long journeys. This model is made from padding polyester, cotton or polyester and water-repellent impregnation.
It is not difficult to put such a collar on an animal, because it is attached with Velcro fasteners to a regular collar or has convenient fasteners. This collar does not have to be unfastened every time to feed your pet, because you can eat food, drink water and move actively in it. It can also be washed if it gets dirty with medicine or food.
Photo gallery: range of protective collars for cats
A cone-shaped collar made of non-woven water-repellent materials causes less discomfort than a plastic product. The most comfortable collar for a cat is like a life preserver.
You can buy a plastic collar inexpensively or make it yourself
The size of the collar should correspond to the circumference of the cat's neck with an allowance for freedom of fit (you can stick a finger between the neck and the collar). A narrow collar will cause additional discomfort to a sick animal, while a collar that is too wide may slip off the neck.
The width of the protective field (length of the product) must be sufficient to protect the cat from harming itself. It is approximately equal to the height of the cat's head with a slight increase. If these parameters do not meet, the collar will either not perform its protective function or will interfere with the animal’s movement around the house.
Factory collars have a unique division into sizes, in which the numbers correspond to the scale of the protective field:
- No. 7 (7.5 cm);
- No. 10 (10.5 cm);
- No. 12 (12 cm);
- No. 15 (15 cm);
- No. 20 (21.5 cm);
- No. 25 (25 cm).
Thus, for small kittens, size No. 7 is often chosen, and for adult kittens, sizes No. 10 and 12 are often chosen.
Please note that the collar should not have a pungent “chemical” smell. This is both unpleasant and dangerous for the cat.
How long should the collar be worn?
How long will you need to walk in this protective cap? The time it is worn is determined by the veterinarian and depends on the rate of tissue regeneration: after surgery, for example, it is worn for 10–12 days.
If the animal has quickly adapted and does not try to get rid of the veterinary collar, it is removed only during meals so that the cat does not injure the neck muscles. At this time, it is necessary to clean it and treat it with an antiseptic, but you need to keep an eye on the cat: as soon as he eats, you will have to immediately put protective equipment on him.
Choosing a product in the store
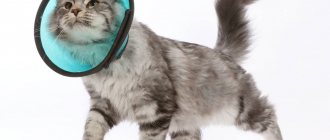
The veterinary collar is transparent plastic.
The advantage is that the animal’s view is not blocked and it does not interfere with its orientation in space. The sides are connected to each other and form a cone shape, which allows you to move and eat food as usual. The holes at the bottom allow you to secure the product with a collar or a simple bandage. There is a certain numbering: No. 7 (7.5 cm), No. 10 (10.5 cm), No. 12 (12 cm), No. 15 (15 cm), No. 20 (21.5 cm), No. 25 (25 cm ). The number or size refers to the width of the protective field.
For kittens use No. 7, No. 10 is suitable for a medium-sized cat and No. 12 for a large cat.
It will not be difficult to find and buy such a product, especially since it is inexpensive. The main problem will be finding the right size. In this case, you can make a protective collar for your cat with your own hands using what you have at home.
DIY Elizabethan cat collar made from cardboard
This design provides assistance during the rehabilitation of pets after operations. The main thing to consider is that the collar should be comfortable.
If it is not possible to buy a suitable accessory, then the most affordable option would be a homemade cardboard collar. You can use any cardboard box from which 2 semicircles are cut out, the inner diameter of which should be the length of the collar. Then use tape to connect both parts.
The collar is attached to the collar. In order not to spoil it, you need to put a cover on the collar and sew a cone-shaped protection to the cover.
Features of the pattern
- In order to make a collar for animals, a pattern in the form of half a ring is used. It can have different height, length, width. From such a part a cap is made with a cutout for the neck, its edges are securely fastened.
- When creating a pattern, you need to measure the circumference of the neck (this will be the length of the inner semicircle), the length from the neck to the tip of the nose (plus five centimeters). You can make a small reserve according to the parameters, cut out the blank, fold it, try it on and trim off the excess.
If the collar greatly blocks the cat’s view of the environment, the pet will be very nervous , which will have a bad effect on the progress of rehabilitation.
Collar requirements
Rules for using the collar: it should not fit very tightly and sit loosely: leave a distance of one finger between it and the neck.
A smaller gap will lead to chafing of the skin, and a larger gap will allow the pet to remove the protection.
The edges should not be sharp so as not to injure or rub the animal's skin. The collar should also be as transparent as possible. You need to buy a protective product without an unpleasant odor; you should not buy something very cheap.
How to wear?
There are times when the veterinarian did not put a collar on the animal or when you made one yourself.
In such cases, the question arises: “how to put it on correctly?” To do this, you need to follow some simple rules. First, you need to measure the cat's neck so that the collar fits. It should not dangle, but also not put pressure on the neck. Then prepare the collar. Attach it to a collar or piece of soft cloth. If the animal is scared, then take it, wrap it in a soft towel and calm it down. You need to put on the collar very carefully so as not to cause harm. Many animals do not like having foreign objects put on them, and cats can behave aggressively. In this case, you will need an assistant.
Then you will have to hold the cat by the scruff of the neck. Once her head is in the collar, try to calm her down. Then attach the collar to your neck. Check that nothing is pressing or loose. There should be a finger space between the collar and neck.
When and why does a cat need a collar?
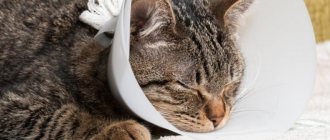
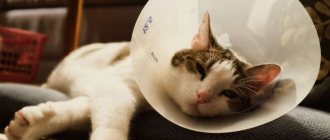
A protective collar is a veterinary device in the shape of a horn or funnel that limits the animal's mobility. As a means of protective therapy, the collar will prevent the cat from licking medications from the body, licking a post-operative suture or a damaged area of skin.
The veterinary collar is also called the “Elizabethan” collar. This is due to the fact that it resembles a piece of clothing worn by noble ladies of the era of Queen Elizabeth I of England. In the 16th century, lush, rigid collars made of starched fabric (usually lace) were in fashion. Of course, turning your head in such a dress was extremely difficult. Later, this design served as the basis for the creation of a veterinary collar.
The veterinary device resembles the collar of Elizabeth I's royal dress
Barrier therapy, of which the collar is one component, is used for a number of health problems in pets. Here are the main ones:
The cat tries to lick the wound (especially if it heals and begins to itch), this prevents the restoration of the damaged area of skin. The animal has undergone medical surgery (for example, a spay procedure or tumor removal)
In such a situation, it is important to prevent licking and chewing of the sutures placed by the veterinarian. The cat has been neutered. In this case, the animal will not have stitches, but the operation site is treated with an antiseptic, which also cannot be licked
There is also a danger that the cat will begin to lick the sore spot and thereby provoke bleeding. Your pet's ears hurt. The animal begins to scratch them, which provokes additional infection, as well as untimely removal of veterinary drugs from the ear cavity. The cat was treated with a remedy against ecto- and endoparasites. Animals should not lick such substances, as this can cause poisoning. And you won’t have to wait for the effect of the antiparasitic agent either. A cat that is active, fearful or aggressive needs to have its fur or nails trimmed. The collar will protect the owner from pet bites.
The protective collar is shaped like a bullhorn
In all of the above cases (except, perhaps, for ear diseases and treatment for parasites), the owner of the animal is faced with a choice: a special blanket or a veterinary collar.
The blanket will protect the postoperative suture from not only germs, dirt and fungi getting there, but also from the cat itself, which after surgery tries to chew or lick the place that bothers it
The advantages of the blanket are that it:
- does not restrict the cat's movements;
- does not cause her anxiety or irritation;
- allows you to wash exposed areas of the body;
- protects stitches or wounds from contact with other objects that are not always safe and sterile.
But especially active pets manage to take off their blankets. And if they leave them alone, they begin to lick the sore spot through the fabric. Sometimes even this is enough to damage the seam. Blankets also get dirty quickly, especially if the wound needs to be treated with medications.
Advantages of a collar compared to a blanket:
- completely limits the cat’s access to the sore spot, be it the head, paws or torso;
- the animal will not be able to hide in a hard-to-reach or inappropriate place thanks to the voluminous collar on the neck.
The pet will be dissatisfied with the presence of the collar, since it can hardly be called comfortable. The cat will cling to surrounding objects with it and try to remove it. And most importantly, the collar needs to be chosen correctly.
Some owners purchase both barrier products for their pet to be on the safe side.
Using a blanket and collar at the same time completely protects the wound or seam from access by the animal
Veterinary pharmacies and pet stores offer a large selection of Elizabethan collars for cats. Their cost depends on the materials and the size of the pet for which the device is purchased (they are not divided into cat and dog). The price of such products ranges from 100 to 1200 rubles.
Types of collars
You will probably be surprised, but if you approach the issue of buying a collar with all seriousness, then the variety of shapes and sizes will frighten even an experienced four-legged owner. Each manufacturer makes its own arguments and demonstrates the advantages of its products.
Anti-parasitic collar (from fleas and ticks) - a rubber product impregnated with repellent. Naturally, you cannot make such a collar yourself; you need to buy it. However, a sad anti-parasitic collar can be decorated; it won’t make it any worse.
A decorative collar (not a walking one) is a widely popular accessory for cats participating in exhibitions and shows. Choosing a decorative collar is a whole science. Some cats need accessories in contrasting colors, while others prefer collars that blend in with the fur and are decorated with a pendant. The width of the collar is also important, since it should not visually distort the proportions of the animal’s body. If you are unsure which collar is right for your pet, the choice should be based on the criteria of lightness (low weight) and softness of the material.
Decorative collars that are not for walking purposes can be purchased from folk craftsmen. The fact is that beautiful, bright and exclusive collars are not difficult to make at home. Below you will find step-by-step instructions for making different types of these accessories. Prices for handmade products fluctuate and mainly depend on the workload and reputation of the craftsman.
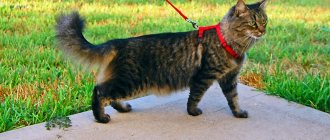
Walking collar – the difference between this and the previous model is the presence of a clasp that will open under the weight of the cat’s body. The fact is that while walking, a cat can get caught on something. There are known cases where pets hung on branches, fences, table hooks and suffocated. A cat can get stuck if it tries to crawl through a narrow gap and starve to death. The self-release mechanism will release your pet from captivity if sufficient pressure is applied to it.
A collar with an address tag is the most useful variety, as it serves not only for decoration, but also for security. An address tag helps pets find their way home, and if you think your cat won't get lost because she won't leave the house, don't be overconfident. Hundreds of animals disappear without a trace, falling out of a window or running out the door in the chaos. Of course, you are not obligated to buy exactly the proposed model; the token can be purchased separately or made.
The function of such an accessory is to prevent hunting so that the cat cannot catch a bird or rodent (a potential carrier of a virus or parasites). The 24-hour ringing with every step will greatly irritate your pet.
How to make a cat collar with your own hands from a plastic bottle
The main condition for high-quality production of a bottle collar is the correct size. In most cases, a two-liter bottle will do. Manufacturing process:
- On the neck of the bottle, select a place with a diameter suitable for the cat’s neck.
- From this line the height of the collar is measured and all excess is cut off.
- A vertical cut is made and holes for lacing are made on each side.
- The holes are treated so that they do not injure the animal. For example, you can heat them with a candle so that the edges melt and become less sharp.
- Pull the lace through the holes.
- Improve the quality of the accessory by attaching a case with loops for the collar.
Important! The animal should be comfortable. Therefore, you need to regularly check that the cone does not press or rub your neck.
A plastic bottle as a collar is the most economical option
Wearing rules
The main purpose of such a pet collar is protection. You can watch how the animal tries to take it off and how uncomfortable it is for him to be in it. Don't be led by emotions. Over time, he will get used to the new “accessory”.
After putting on and securing the product, make sure that the animal feels comfortable, namely: the product is not secured tightly and the edges do not rub the neck.
There are times when a cat wearing a collar refuses to eat. You can try placing the bowl on a hill so that the edges of the product do not touch the floor. Otherwise, you will have to take off the protection during feeding and put it back on. Be vigilant at this time so that your pet does not get into trouble.
Remember that such an adaptation, like the situation itself, is stressful for the animal. They sense your mood well, so take your pet in your arms more often and show care. Sometimes you can remove the protective product and let the cat rest under your careful supervision.
Multi-storey plywood structure for a cat
Complex projects are best made from wood
This material allows you to implement any sketch and, what is very important, you can later return to refinement and improve the complex by adding additional elements to it. At the same time, drawings with the dimensions of a cat house, for example, made of plywood, should immediately provide for the future development of the play area
Otherwise, you will have to redo the base and make changes to the entire structure.
Production of a gaming complex in stages
If the owner plans to make a play set for a cat, it is not recommended to skimp on the size of the stand platform. It should be big and strong.
- The main cat house should be placed in the middle. In the future, such a layout will allow organizing space to the left and right of the main building.
- If the base platform is deep enough, then you can use the space behind and in front for additional accessories - ladders, passages, placement of soft sleeves and other similar labyrinths. In cats, they never go unnoticed.
- Cats traditionally like multi-tiered buildings. Therefore, it is reasonable to plan the placement of elements in advance not only in the horizontal, but also in the vertical plane.
A universal plywood cat house is easy to make with your own hands. In the future, it will be possible to attach any other materials and forms to it - from soft fabric to paper and plastic.
Attaching a tree to the house
Here it is best not to invent anything, but to find a branch of a suitable size in the forest or park.
- Clean off any remaining bark and remove any damage (if any).
- Dry thoroughly.
- Treat with an antiseptic.
- Attach it to the wall of a wooden house with staples, and to the base of the structure with metal corners. The joints of structural elements must be hidden under soft fabric covering. This way the appearance will not deteriorate, and the cat will not be able to get hurt on the iron.
- If the tree has branches, it is recommended to install it with the top down. Then the base is stably connected to the branches at several points.
- A wide wooden viewing platform is installed at the top of the trunk. The cat will be able to climb up and feel comfortable, just like in its natural environment.
Making a scratching post with your own hands
Another way to provide a place for your cat to grind its claws is to make a device with your own hands.
- Take a piece of plastic pipe (Ø 150 mm or more). The length is determined by the size of the cat. For a large Maine Coon, you need to provide at least a meter, and for an ordinary outbred one, 60-70 cm will be enough.
- Prepare a thick rope - jute rope is best suited.
- Attach 3-4 metal corners to the bottom of the pipe. In the future, they will be needed for a reliable connection to the base of the playing area.
- If an additional connecting node is planned on the wall of the house, then immediately install a semicircular bracket to the desired height. All metal elements are installed in advance and subsequently covered with rope braiding.
- Wrap the edge of the cord with electrical tape and screw it to the pipe with a self-tapping screw through this seal.
- Another way is to drill a hole at the bottom along the diameter of the rope, pass the tip through it and tie a thick knot on the back side. It will prevent the rope from coming out and will ensure a tight tension of the turns.
- Carefully and tightly wrap the pipe along its entire length, covering the metal parts and leaving no free space between turns.
- At the top, seal the edge again with electrical tape and screw it to the plastic.
A cat house with a hand-made scratching post is already a good foundation for a future play complex. The rope device is somewhat inferior to natural wood, but overall it copes with the task perfectly and withstands the pressure of sharp cat claws for a long time.
Review of Perfect Fit food
Perfect Fit is produced by the well-known company, which produces popular economy class products - Whiskas. Many professionals say that Perfect Fit products, although slightly better than Whiskas, are not up to par with premium food. These reviews apply to both dry and wet food.
has been producing products for cats for several decades, this company operates internationally. Perfect Fit is translated from English as “perfect fit.” In principle, the quality of such products for cats is not at the lowest level, but also very far from ideal.
All Perfect Fit cat food products are packaged in bright packs that attract the attention of buyers. But what is important for the consumer is not the packaging, but the composition and quality of the product.
Not one of the Mars branded foods does not contain natural meat, but in premium foods, although in small quantities, it is present. Perfect Fit contains dehydrated poultry protein, with chicken protein present at 31%. Consumers may think that the food consists of 31% poultry meat, but this is not true.
Here is an example of the composition of Junior Perfect Fit kitten food. Here's what it says on the box: dehydrated poultry protein (including 31% chicken), corn protein, animal fat, corn meal, corn, dried liver, wheat breakdown products, potassium chloride, cellulose, rice (at least 4%), dried cereal protein, salt.
If you read the information about this food on the manufacturer’s official website, it immediately becomes clear that this is an absolutely ideal food for kittens. The company positions its products as optimally balanced feed in its composition. You shouldn't believe this. First of all, study the information about the composition of other foods, for example, Berkley or NOW Fresh.
Perfect Fit manufacturers have carefully developed the composition of their products. They claim that for cats their products are absolutely balanced in terms of the presence of vitamins and minerals that animals need. Again, do not forget that this is just a marketing ploy and in order to get proper nutrition, you should not completely switch your pet to Perfect Fit products.
Like any cat food, this product has its pros and cons.
Benefits of Perfect Fit cat food:
- Low cost.
- Can be purchased in almost any store, both specialized for animals and in a regular supermarket.
- Assortment for kittens and cats, dry and wet food.
Disadvantages of Perfect Fit cat food:
- Almost all proteins are of plant rather than animal origin. Cats are carnivorous animals, and they require animal proteins to grow properly.
- The composition uses a lot of corn to create volume. This is a fairly cheap filler.
- There is no natural meat, only offal.
All Perfect Fit products are represented by 8 types of food.
- Junior - food for kittens and teenagers. Suitable for babies up to 6 months. They need a diet different from that consumed by adults. A growing body needs more minerals and vitamins. Perfect Fit food for kittens and adolescents contains vitamins C, E, as well as essential minerals. This food is produced in the form of small granules, so the animals’ gums and teeth develop better.
- Active - for active pets. This food is suitable for very active adult cats. Such food helps the animal to always be in shape. To maintain the physical activity of cats, the food contains a lot of protein, vitamins A and B, and useful minerals.
- Sensitive is a dietary food. Well suited for animals that suffer from allergies or suffer from indigestion. The product is suitable for maintaining a diet. Contains only natural plant ingredients, no soy or wheat waste. It is very important to give this type of food to cats that suffer from liver and kidney diseases.
We suggest you familiarize yourself with: Leash and collar for ferrets
I n-home - for adult domestic cats. This type of food is suitable for animals that are not active and never walk outside. To prevent your cat from becoming obese due to a sedentary lifestyle, she needs special nutrition. To maintain proper metabolism, this food contains biotin and omega acids.
- Sterile - for castrated and sterilized individuals. Sterilized animals also require special care. The composition includes useful substances that help normalize weight and balance metabolism.
- Senior - nutrition for older cats. Suitable for animals over 8 years old. Older cats require special nutrition that does not contain the vitamins and minerals necessary for activity during adolescence. This food is rich in antioxidants for a beautiful shiny coat, taurine for healthy heart function and glucosamine for strong bones and normal joint function.
- Hair{amp}amp;beauty - for the beauty of the fur of cats. Designed for the care of long-haired cats. Perfect Fit H air{amp}amp;beauty products contain beneficial vitamins and minerals that give the coat a beautiful, healthy shine.
- I n-form - to maintain normal weight. Used in feeding animals that lead a sedentary lifestyle and are prone to obesity. This can happen after suffering some kind of illness, as a result of which the metabolism is disrupted. The product contains L-carotene, which promotes the rapid breakdown of fats.
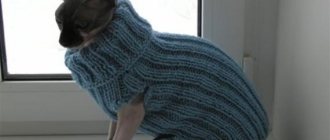
Preparing for work
Before you begin, you should decide on the purpose of the pet costume, the frequency of its use and design. Any homemade clothing for cats must include:
comfort: when worn, the pet is comfortable in the outfit, its movements are not constrained; quality: when making clothes for a cat with your own hands, you need to pay attention to non-artificial materials. Only inserts or trim made of synthetics are allowed
The reverse side of clothing for cats should be completely natural to avoid allergic reactions; simplicity: simple cut of clothes ─ a minimum of seams and costume items; practicality: clothes for frequent wear should not lose their appearance after cleaning and washing.
Material selection
You need to decide whether the cat's clothing will be sewn or knitted. In the first case, fabrics, accessories, and finishing are selected. In the second ─ suitable yarn.
Choosing the material for your pet's clothing is the most important part of the work. If the cat doesn’t like it, all efforts will be in vain. It is difficult to force your pet to wear such clothes.
In order not to make a mistake with the choice, you can first put the selected material or yarn on the cat’s bed. The fabric must first be washed with a neutral detergent. If the surprise on the bedding does not cause protest from the pet, then you can safely start creating patterns, sewing or knitting.
It is better to choose soft, flexible fabrics for cats: knitwear, cotton or linen with a stretch effect. Clothes made from this material are comfortable and will not hinder your pet’s movements. The appearance of things will not suffer from frequent washing.
The finished knitted product must be washed.
Taking measurements
Creating clothes for a pet with your own hands begins with creating a pattern, for which you need to take measurements
It is important to determine the size correctly. The fit of the product on the cat and its comfort depend on this.
To take measurements from the model, you need to take a centimeter tape. To create a universal pattern, it is enough to determine 3 main parameters of the pet:
- ОШ – neck circumference. Measured at the base of the neck - where it meets the chest;
- OG - chest circumference. Calculate along the widest part of the cat’s body, under the front legs;
- DI is the length of the product. Equal to the distance from the base of the neck to the base of the tail.
Based on these measurements, you can design any styles of clothing for various purposes for your cat.
If the product involves sleeves and a collar, then the following measurements are also needed for the pattern:
- OT - body circumference. Measured across the stomach, in front of the hind legs;
- OPL and OPL are the girth of the front and hind legs, respectively. Calculated based on their widest part;
- LSH - neck length from base to ears;
- DT - length of the body between the front and hind legs.
When creating a drawing, length measurements are taken in full, and the length of the girths is divided in half. Armed with the numbers, you can safely start cutting out a costume for your pet.
Universal drawing
The figure shows an approximate drawing from which you can create various clothing patterns for cats.
The top image is the back, consisting of two parts. The lower part is the tummy. Half of the part is drawn, a fold runs along the middle line. Semicircular recesses are holes for the pet's paws (armholes).
The DI measurement is laid along the lightning line. Next, a drawing is built from it in accordance with the size of the cat. Line CD is the length along the tummy from the front to the back paw.
When cutting the product, remember that clothing for cats should not be too tight. To do this, add 1-3 cm to the pet's girth measurements for a loose fit.
Seam allowances must be made along the contour of the pattern. Their size is adjusted as follows: add 0.5-1 cm along oblique and figured cuts, and 1-2.5 cm along side and shoulder seams. Clothes for a cat should not be too loose.
Required Items
To create clothes for cats with your own hands, you need to prepare a workspace: a table or any flat surface for cutting.
You will also need:
- paper or fabric for making a pattern;
- yarn and knitting needles or crochet hook if the project involves a knitted item;
- fabric: main, lining, cushioning (insulation);
- tailor's chalk;
- adhesive materials for strengthening oblique and figured cuts;
- sewing accessories: buttons, snaps, zippers, Velcro fasteners;
- finishing accessories: braid, lace, adhesive applications;
- sewing threads;
- needle;
- scissors;
- sewing machine.
Now you can start creating an original, stylish set of clothes for your pet.
When to use
Initially, the veterinary collar was a post-operative accessory, but the scope of the protective collar for cats has expanded over time. This means of barrier therapy is used both in a hospital hospital setting and at home.
When to use a collar
- After castration and sterilization operations, so that the animal does not lick the stitches, irritating the wound.
- After treating open wounds with ointments and powders to prevent the animal from licking them.
- During the course of treatment for ear mites, prevent your pet from scratching its ears.
- After treating the animal’s coat with antiparasitic agents: sprays, drops, shampoos. The cat will not be able to lick off the harmful medicine.
- If your pet is sick with lichen or another fungal disease and needs to treat the affected areas with antifungal ointments.
- After a fight or injury, if the cat needs treatment for scratches and wounds.
- In the postoperative period - after any abdominal surgery, injuries of the limbs and spine, traumatic brain injuries.
- During the treatment of allergic and infectious skin diseases.
- After eye surgery and time of treatment of ophthalmological diseases.
Why do you need a veterinary collar for cats?
This barrier protection product performs the following functions:
- Prevents the cat from removing post-operative dressings.
- Protects seams and open wounds from infection and injury.
- Allows medications (ointments, drops, powders) to be absorbed.
- Protects fastenings of metal structures in case of limb fractures.
- Prevents the licking of toxic medications (anti-parasitic drops).
- Protects the cat's head from scratches and scratches.
- Does not allow the bandage to be torn off from the head and eyes.
How long should you wear the collar?
The cat cone is used as prescribed by a veterinarian and is not removed from the animal until the wound has completely healed. Depending on the severity of the wound, the wearing period can range from several days to several weeks. During this period of time, the animal should not be allowed outside.
Wearing a special collar increases the effectiveness of many therapeutic measures and promotes a speedy recovery of the cat in the postoperative period.
Instructions for use
It’s not enough to just buy a collar for cats and put it on, you need to remember that the animal is wearing a hindrance, and he will have to help him live with it. To begin with, the collar must be removed at each feeding - the cat simply cannot reach the food in it. You will have to do the same when your pet wants to drink, so you need to constantly monitor her.
If injections are given in the cat's scruff, you need to put on the collar so that its clasp (the roughest part) does not fall on this place.
- Choose a post-operative collar for your cat exactly according to the size of the animal. It should not fall off or be too tight.
- Do not use models that are too heavy or bulky - they excessively restrict the cat’s movements and interfere with visibility.
- Do not opt for the cheapest models - they may be made from toxic materials.
- If the structure has sharp edges, they must be treated with adhesive tape or tape.
- Special “children’s” models are selected for kittens; it is unacceptable to use a collar “for growth.”
- When a cat is wearing a protective cone, it should not be allowed outside - it is not safe.
- When using the collar, you need to organize the cat's eating area so that she can reach bowls of food and water.
- If a cat refuses to eat while wearing a collar, it should be fed by hand or without a collar, but under the supervision of the owner.
- The structure is not removed until the wound has completely healed or until the veterinarian gives permission.
- During use, it is necessary to check the skin under the collar to prevent chafing.
- The collar prevents the cat from grooming itself - do not forget to brush the animal daily.
- The collar makes it difficult for the animal to move; prepare the living space in advance. Make sure your cat doesn't accidentally get stuck in narrow passages.
We suggest you read: Description of cats with big ears