The most common operation now is sterilization and castration of cats. Uncastrated cats, especially those who were given hormonal drugs, suffer from mastitis, cystosis, purulent pyometra (purulent inflammation of the uterus), hydrometra (fluid formation in the body of the uterus), mammary cancer, tumor diseases of the uterus and ovaries. All these conditions threaten the cat's life and require immediate surgical intervention. Operations are also performed for fractures, ruptures of internal organs and for other reasons.
The main question after the owners have taken the animal from the veterinary clinic is how to care for it now? In addition to injections, tablets and ointments for treating stitches, the cat needs a protective collar.
What types of protective collars are there?
An Elizabethan collar should not cause your pet much discomfort, so you need to choose the right size and decide on the material from which it is made.
Protective collars are:
- Made from durable plastic.
- Fabric.
- Cardboard.
Plastic collars are easy to clean, hold their shape reliably and, unlike other analogues, have a lower cost. But when they come into contact with other objects, they make noise, so the cat may not feel too comfortable. In addition, over time, plastic cones crack and break.
The plastic collars are secured with three or four fastener strips. The size is adjustable with tongues.
There are different types of plastic collars available for sale. For example, in the form of a tube that is closed in a circle. A removable cover is placed over it, limiting the mobility of the neck. This design will not allow the cat to reach postoperative wounds.
A more acceptable option for pets with sensitive, delicate skin is soft fabric protective collars. Made from non-woven, water-repellent, non-toxic, hypoallergenic fabric or practical nylon. Such collars are flexible, soft, lightweight, and do not interfere with the free movement of the neck. In such a collar, a cat can sleep and eat without experiencing discomfort while wearing it.
Some models of fabric collars may have plastic inserts inside, the size of which is approximately half the size of the cone. It gives rigidity to the entire structure. Such models are ideal for energetic, hyperactive cats.
Fabric collars are secured to the animal's neck with Velcro or special fasteners.
What to look for when choosing
The effectiveness of a protective collar depends primarily on the correctly selected model. To avoid mistakes, follow basic expert advice:
- The height of the cone should be such that the cat is both comfortable and safe. Don’t take one that’s too high, but a short one isn’t an option either. In the first case, the cat will not have lateral vision, in the second, it will easily reach painful areas.
- It's not worth saving. In the production of budget models, harmful materials with a specific odor are often used.
- The tapered part of the collar adjacent to the neck should not be extremely elastic. There must be free space between the bandage and the animal's neck so that the finger can easily pass through. Close contact with the skin is fraught with the occurrence of an allergic reaction and breathing problems, and weak contact can lead to quick removal of the cap.
- The prickly protrusions of the structure must be sealed with tape so that the animal does not get injured.
- It is not advisable to buy products that are too large and heavy, even if they are visually attractive. Such structures complicate movement and prevent free vision.
It is important that the pet is not able to rip off the collar or break it.
Postoperative period
After castration, which is carried out under anesthesia, in about 20-30 minutes you can take the cat home from the veterinary clinic. It is best to place the operated cat on a soft, clean bedding on the floor, since coordination of movements is impaired for several hours after anesthesia. In addition, the cat is very weak and may experience severe discomfort. Some pets show anxiety and cannot find a place for themselves, while others, on the contrary, recover from anesthesia and constantly sleep.
This condition can last from 24 to 48 hours. It all depends on the weight, age of the cat, general condition, individual parameters, the state of the nervous system, as well as on the dose of anesthesia used for anesthesia of the drug.
Caring for a neutered cat involves creating the most favorable, calm environment possible. During this period, the pet needs increased attention and care, since any surgical procedures are stressful for the cat.
Despite the fact that postoperative wounds are small and heal quite quickly, in order to avoid possible complications, it is necessary to closely monitor your pet.
Your veterinarian will tell you how to properly care for your cat after surgery, what to use to treat wounds, and when you need to bring the cat to have stitches removed, unless, of course, you used self-absorbable surgical material.
To ensure that the rehabilitation period passes quickly and without any complications, follow all the recommendations of the veterinary surgeon.
In the first two or three days, make sure that the cat does not rub its back on the floor or try to remove the stitches. But since it is not always possible to monitor the cat around the clock, we recommend wearing a special protective collar. Only take it off when feeding.
How to care for your cat in the following days?
On days 2-3 after surgery, the cat’s behavior may change dramatically. Changes can vary - a cat can become either very aggressive or very apathetic. This happens due to the fact that the hormonal system is being rebuilt.
This behavior does not need to be treated, and the owner should be understanding of the animal's condition. Of course, a complete restructuring of the hormonal system will take several months, but after 5-6 days the cat’s behavior will return to normal.
You should also think about nutrition, toileting, and wound care after surgery.
Nutrition
Regarding nutrition, you need to know the following after castration:
- In the first 5-10 hours after surgery, the cat will completely lose its appetite. There is no need to worry about this. The main thing is not to forget to give the cat water.
- In the first 1-3 days after surgery, the cat will have poor appetite. During this period, it is advisable to give up dry food, and feed the cat with meat broth or rare porridge with pieces of lean meat. Never overfeed your cat or force him to eat a lot!
- On days 3-5, appetite usually returns to normal. However, remember - now the cat does not need such a large amount of energy, so food intake needs to be slightly reduced.
- It makes sense to buy special food for neutered cats at the pet store. Also, castrated cats need to be given food that contains special additives that prevent the development of urolithiasis, since after castration the risk of developing this disease increases significantly.
- After castration, you need to completely give up fish - fish contains a large amount of minerals that a castrated cat will no longer need, so they will begin to form as kidney stones.
Toilet
Regarding the toilet you need to know the following:
- At first, it is advisable to use white or light-colored litter for the toilet. The fact is that a cat’s wound can bleed, and this will be very noticeable on light-colored litter.
- After each trip to the toilet, it is advisable to disinfect the tray (for example, with boiling water), and throw away the filler. This must be done until the cat’s wound stops bleeding.
- It is also advisable to give preference to soft toilet fillers to avoid irritation.
- If your cat does not want to go to the toilet after surgery, it is advisable to ask your doctor to prescribe him some safe diuretic medication.
How long should a cat wear a collar?
Castration of cats is considered a simple operation. However, as after any other surgical intervention, the pet requires careful and proper care. The postoperative wound is small, and the sutures are predominantly self-absorbing. Waking up after anesthesia, the cat will try to lick the wound. If you give him this opportunity, it will take a long time to heal. In addition, infection may occur. Based on this, veterinarians insist that the cat needs to wear a medical collar for the entire rehabilitation period. This process can last 7-14 days. The duration of wearing depends on the individual characteristics of the pet’s body, its age and state of health. They put the collar on the pet while he is still under anesthesia.
The more attentive the owner is to the cat, the faster the seam will heal and the need to wear a protective device will disappear.
What to do if he takes it off?
Most pets take a long time to adapt to the collar and initially intend to remove it. In most cases, this is an adequate reaction, but there are times when this indicates improper use, which brings stress and inconvenience to the pet. You can understand this by how much time has passed since wearing it.
If the cat tries to remove the structure for the first time, then there is nothing to worry about. You can train your pet. You just need to pay attention to him, you can sit him on your lap and play with him. This will help the animal get used to the collar. And if a day or more has passed, then it’s worth finding out whether the collar is causing discomfort (it’s too tight, the corners are digging in, blocking the view). Otherwise, it should be replaced.
To learn how to make a veterinary collar for a cat with your own hands, see the following video.
What to replace it with?
It is not difficult to make a pattern for such a product.
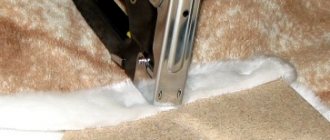
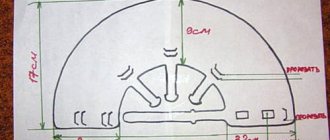
You can make a collar for a cat after castration yourself from scrap materials. Transparent, loose plastic, cardboard, or fabric are suitable for this. The pattern of a cone-shaped collar is not difficult to make. Initially, a semicircle is cut out, the diameter of which is 20-25 cm. Then the part is rolled into a funnel and a hole is cut out at the base, equal to the circumference of the cat’s neck. The sides are stapled or framed with ribbons.
To avoid injuring the cat, the edges of a product made of plastic or cardboard should be covered with tape or adhesive tape. A quick solution to the problem is to use disposable tableware. The plate must be cut in one place towards the center. Then cut a circle in the middle corresponding to the diameter of the pet’s neck. This slit will help you easily put on the resulting collar. Secure the incision with tape or a stapler. It is acceptable to use both plastic and paper disposable plates. But it is worth remembering that protective collars made of paper are short-lived. The edges of the vessel are also treated with adhesive tape.
Making a protective product for a pet
You can make a collar for your pet yourself. There are several different ways to make it, depending on the materials chosen.
Express version made from cardboard
If you don’t have time to purchase a collar, but you need it urgently, you can build it in a short time from what you have at hand. You will need:
- thick cardboard;
- tape measure;
- compass;
- stapler;
- scissors;
- scotch.
The procedure is as follows:
- On a sheet of cardboard we draw a semicircle (diameter - 20–25 centimeters).
- Cut out the part and roll it into a funnel.
- Using a measuring tape, we find out the circumference of the pet’s neck.
- At the base of the cone we make a hole, the diameter of which is equal to the circumference of the cat’s neck.
- After you wrap the future collar around the cat’s neck, its side sections will need to be secured with a stapler or tape.
Video: making an “Elizabethan” collar with your own hands from cardboard
Collar made of plastic
To make a plastic collar you will need:
- two-liter plastic bottle or stationery folder;
- Velcro;
- stapler;
- scissors;
- adhesive plaster.
A plastic collar is not the most comfortable option available. But if the animal does not have too long a rehabilitation period, then it is quite suitable, especially since this product can be made more comfortable.
Do not give in to provocation - any animal will try to remove the collar
It is made as follows:
- Cut a two-liter bottle in half (or unfold a plastic folder), draw and cut out a collar in the form of a semicircle (it is also better to limit its diameter to 25 centimeters).
- Fold the semicircle into a cone. At its base, cut a hole with a diameter determined by the thickness of the cat’s neck.
- Attach Velcro fasteners to the side sections of the cone with a stapler. You can also make holes at the edges of the cuts using sharp scissors and connect them with a soft cord or ribbon.
- Cover the top and bottom edges of the collar with adhesive tape. This will soften the edge adjacent to the cat's neck and strengthen the one that will encounter obstacles. It is very important that all edges of the homemade plastic collar are even and smooth.
Video: making your own plastic collar
Fabric collar
Despite its apparent complexity, making a fabric collar will be no more difficult than the first two. This is the most comfortable and soft protective product for a cat.
You will need:
- paper;
- ruler;
- compass;
- scissors;
- threads;
- needle;
- natural fabric;
- felt or thick non-woven fabric;
- Velcro.
The shape of the collar is again a semicircle with a diameter of 25 centimeters. The collar pattern is first drawn on paper.
Then proceed like this:
- Using the resulting layout, apply the pattern to the fabric (it is better to use cotton or linen) and cut out two identical parts.
- They try the pattern on the cat and cut off the excess. By the way, it is always better to cut a piece of a larger size and reduce it if necessary, than to save fabric and find that the product is too small.
- Using the same pattern, you need to cut out parts from felt or non-woven fabric. You can use several layers of other, less dense fabrics (for example, drape) and stitch with small diamond patterns.
- Now a layer of strong material is sewn inside two pieces of thin fabric. To do this, the three resulting layers are stitched along the entire perimeter, excluding a small section 5 centimeters long. It is necessary so that you can later turn the collar right side out through it.
- Turn the product inside out and iron it.
- The remaining hole is sewn up by machine or by hand.
- Ties or Velcro are sewn onto the side edges to secure the device to the cat’s neck.
Fabric collar - soft and comfortable barrier
It is important to remember the disadvantage of a fabric collar - it retains its shape worse than other models. An active cat that tries to get rid of it will quickly deform the protective accessory. To avoid this, you can make the collar fields not too wide - let them cover only the cheeks. And along the outer perimeter of the collar you can put a thick edging - it will also help the product keep its shape.
Collar made from disposable tableware
An original solution would be to make a collar from cardboard disposable tableware. Some owners manage to fit the cat's head into the hole cut out in the middle, but it would be much better to cut the plate in one place towards the inner circle. This slot will allow you to put the collar on without disturbing your cat. It can be secured with tape or a stapler.
Cardboard disposable tableware can be used as a protective collar
Collar made on the basis of a purchased one
We have already said that a purchased plastic collar can hardly be called comfortable. Soft collars are not cheap (about a thousand rubles). If you want to save money and at the same time please your little animal, you can buy a plastic collar at a veterinary hospital and turn it into a comfortable product. Just cut off unnecessary straps from a purchased collar and use it as the basis for cutting out fabric parts. You can simply sew the fabric to a plastic base, making punctures along its perimeter with sharp scissors. The second option is to do the same as when sewing a fabric collar. Just use a store-bought collar instead of thick fabric. This will give the soft device extra rigidity.
Types of devices
After castration, the cat must wear a protective collar.
It is important to take great responsibility when choosing a product. When choosing a device, take into account the structure and weight of the animal
The main criterion is neck circumference. The pet should feel comfortable, so the collar should not be tight or loose. The gap in the neck area is no more than two fingers. There are 3 types of collars available in pharmacies and pet stores:
- plastic;
- inflatable;
- soft.
Plastic
Plastic products are a truncated cone with ties that secure the collar. To reduce discomfort, the edges are treated with soft fabric or lacing. Fixation tapes can be replaced with Velcro. The cone-shaped shape does not interfere with the pet's eating, drinking water and sleeping. The animal gets used to this attribute in 2-3 days.
When choosing a plastic collar, you should choose a product made of a more transparent material, which will provide your pet with a good lateral view and will not interfere with free orientation in space. All this will make the cat less nervous and irritated. Such products are distinguished by their practicality, simple disinfection method and low price. However, not all cats feel comfortable with a plastic device. If your pet takes off its collar, you need to hold it in your arms for a while and treat it with something tasty. It is better to remove the collar for a short time while eating. If your pet is irritable and restless, it is recommended to purchase a different type of product.
Inflatable and soft
Devices of the first type are much more convenient for cats. They are made in the form of a roller or circle from a material that is easy to clean. Such collars do not irritate the skin, do not cause allergic reactions, and do not interfere with full vision. The only drawback is the price of the device. It greatly exceeds the cost of plastic. If we talk about soft collars, they are made of non-woven materials on a water-repellent basis and have a cone shape. It is not difficult to put the product on an animal. The pet feels quite comfortable in it. No allergies are observed when wearing it. The cost, unlike inflatable, is more affordable. For very active cats, these collars are the least practical because they can remove even tight collars and get to the sore spot.
How to choose a ready-made veterinary collar
Protective cones for cats are standardized in terms of dimensions; a total of 7 sizes are available.
Size chart of protective collars for cats - table
| Marking | Neck circumference (cm) | Collar height (cm) |
| № 7 | 22–25 | 7 |
| № 10 | 22–25 | 10 |
| № 12 | 28–33 | 12 |
| № 15 | 31–38 | 15 |
| № 20 | 38–44 | 20 |
| № 25 | 44–50 | 25 |
| № 30 | 47–57 | 30 |
At the same time, there are two main types of cones - cheaper and more expensive. The first are translucent plastic products with not very convenient fasteners. The second are opaque or translucent fabric products with Velcro. Both types can be fitted with a bandage or collar, which can act as an additional restraint. They are identical in efficiency.
The simplest and most effective solution is to buy a ready-made veterinary cone at a pet store.
As a rule, you can find No. 10, No. 15 and No. 20 in pet stores. The rest are available to order or when purchased online. Recently, inflatable veterinary collars have also begun to appear; they cost three times more, but the animals should be more comfortable in them. There is no clear opinion yet regarding the effectiveness of this product.
Factory plastic collar in practice - video
When and why does a cat need a collar?
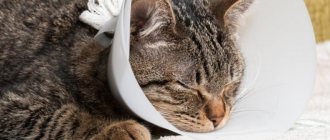
A protective collar is a veterinary device in the shape of a horn or funnel that limits the animal's mobility. As a means of protective therapy, the collar will prevent the cat from licking medications from the body, licking a post-operative suture or a damaged area of skin.
The veterinary collar is also called the “Elizabethan” collar. This is due to the fact that it resembles a piece of clothing worn by noble ladies of the era of Queen Elizabeth I of England. In the 16th century, lush, rigid collars made of starched fabric (usually lace) were in fashion. Of course, turning your head in such a dress was extremely difficult. Later, this design served as the basis for the creation of a veterinary collar.
The veterinary device resembles the collar of Elizabeth I's royal dress
Barrier therapy, of which the collar is one component, is used for a number of health problems in pets. Here are the main ones:
The cat tries to lick the wound (especially if it heals and begins to itch), this prevents the restoration of the damaged area of skin. The animal has undergone medical surgery (for example, a spay procedure or tumor removal)
In such a situation, it is important to prevent licking and chewing of the sutures placed by the veterinarian. The cat has been neutered. In this case, the animal will not have stitches, but the operation site is treated with an antiseptic, which also cannot be licked
There is also a danger that the cat will begin to lick the sore spot and thereby provoke bleeding. Your pet's ears hurt. The animal begins to scratch them, which provokes additional infection, as well as untimely removal of veterinary drugs from the ear cavity. The cat was treated with a remedy against ecto- and endoparasites. Animals should not lick such substances, as this can cause poisoning. And you won’t have to wait for the effect of the antiparasitic agent either. A cat that is active, fearful or aggressive needs to have its fur or nails trimmed. The collar will protect the owner from pet bites.
The protective collar is shaped like a bullhorn
In all of the above cases (except, perhaps, for ear diseases and treatment for parasites), the owner of the animal is faced with a choice: a special blanket or a veterinary collar.
The blanket will protect the postoperative suture from not only germs, dirt and fungi getting there, but also from the cat itself, which after surgery tries to chew or lick the place that bothers it
The advantages of the blanket are that it:
- does not restrict the cat's movements;
- does not cause her anxiety or irritation;
- allows you to wash exposed areas of the body;
- protects stitches or wounds from contact with other objects that are not always safe and sterile.
But especially active pets manage to take off their blankets. And if they leave them alone, they begin to lick the sore spot through the fabric. Sometimes even this is enough to damage the seam. Blankets also get dirty quickly, especially if the wound needs to be treated with medications.
Advantages of a collar compared to a blanket:
- completely limits the cat’s access to the sore spot, be it the head, paws or torso;
- the animal will not be able to hide in a hard-to-reach or inappropriate place thanks to the voluminous collar on the neck.
The pet will be dissatisfied with the presence of the collar, since it can hardly be called comfortable. The cat will cling to surrounding objects with it and try to remove it. And most importantly, the collar needs to be chosen correctly.
Some owners purchase both barrier products for their pet to be on the safe side.
Using a blanket and collar at the same time completely protects the wound or seam from access by the animal
Veterinary pharmacies and pet stores offer a large selection of Elizabethan collars for cats. Their cost depends on the materials and the size of the pet for which the device is purchased (they are not divided into cat and dog). The price of such products ranges from 100 to 1200 rubles.
Table: advantages and disadvantages of protective devices
| pros | Minuses |
| Reliably limits the cat's access to the sore spot | May cause fear and dissatisfaction in the animal |
| Will not allow the cat to hide in a hard-to-reach place | Able to cling to objects |
| Can be purchased by choosing an inexpensive option | The cat is uncomfortable eating |
| You can make the collar yourself | |
| Lightweight and durable | |
| Can be used to trim fur and nails |
Pros and cons of castration
The procedure has a number of advantages that affect the physical and mental state of the pet.
Pros:
- the cat stops marking its territory, the disgusting smell disappears;
- calls for cats stop;
- the fluffy becomes calm and does not show aggression towards people and other pets;
- attempts to jump out of a window or balcony stop, and, accordingly, escapes from the house;
- fights with other cats are excluded;
- eliminates the likelihood of your pet becoming infected with a number of diseases due to frequent matings with different cats;
- the risk of developing pathologies such as prostatitis, adenoma, tumor of the paraanal glands is reduced;
- the pet lives 1.5-2 years longer.
Related article: Everything you need to know about caring for your cat after sterilization
Minuses:
- an increase in the cat’s body weight, the development of obesity and heart disease (the cause is a decrease in mobility and a slowdown in metabolism);
- against the background of urolithiasis, the risk of blockage of the urethra with stones or sand increases;
- The anesthesia required for the operation may have side effects (the result depends on the skill of the veterinarian).
To prevent the negative consequences of castration, you should feed your pet correctly, limiting portions. This will prevent obesity. It is also necessary to prevent urolithiasis, use special food and nutritional supplements. Before the operation, you should have your pet examined by contacting a trusted clinic with highly qualified staff.
Manufacturing process
Before creating a pattern, you need to measure the girth of the dog’s neck and the length of the head. Then you need to take the material from which you plan to make it.
Step-by-step instructions for creating a pattern:
- A dot is placed in the center of the prepared material; you will need to draw three circles.
- The radius of the first is found as the ratio of the neck circumference to the number 6.28.
- The second one is drawn larger than the previous one. To the radius of the previous one you need to add a second value - the length of the head. Measure the resulting number from the center of the circle. This will be the radius of the new circle. You can add a few more centimeters. It is better to make a collar with a margin and, if necessary, shorten it in the future.
- The smallest circle is 4-6 centimeters smaller in diameter than the first. You will need it to make fastenings on the collar.
Then you need to cut out a large circle. Next, draw a line on the product from the center to any point on the resulting circle. Then you need to make a cut along this line. You will get a strip or an unfolded product. Next, you need to cut out the smallest circle and make notches from it to the middle one. They can be folded, attached to the base, and threaded through them, for example, a lace.
From a plastic bottle
For your dog, you can make a protective cone from a bottle that holds five liters of water.
How to make a dog collar with your own hands:
- Cut a plastic strip and fold it into a funnel shape.
- Fix the edges, they should fit snugly against each other. To do this, use tape or adhesive tape.
- To tie the collar, you need to make several holes in the plastic using an awl. All that remains is to thread the lace through the holes.
A bottle collar is very easy to make
From cardboard
The cardboard dog collar can be made permanent, then you need to make a pattern with two radii. If you want to periodically remove it, you will have to make loops by drawing a small circle.
From fabric
A post-operative dog collar can be made from fabric. You need to choose a cotton base and a seal. Felt or non-woven fabric will do. Next, you need to prepare two identical parts from soft fabric and one identical piece from dense fabric. The latter needs to be sewn inside. To fasten the collar, it is convenient to attach Velcro.
From foam rubber
A soft collar can also be made from foam rubber. In addition to the material itself, you will need fabric that will be on top.
Manufacturing procedure:
- Cut a circle from a sheet of foam rubber.
- Prepare two pieces from fabric. They need to be sewn together along the outside.
- Turn the product inside out, place foam rubber inside and sew it up along the inner diameter.
- Make a part that resembles a belt.
- Prepare two long strips of fabric that will be sewn to the base of the collar. They will later be used for the lace.
- Attach the strips to the almost finished product and connect them to each other. Leave slits on the side where a cord is inserted to tie the collar to the collar.
Inflatable
Inflatable collars can be purchased from veterinary pharmacies. They are convenient if the dog travels a lot with the owner. The materials from which they are made do not cause allergies in pets.
Knitted
A knitted collar requires a base. You can prepare two identical parts and sew them, for example, on top of cardboard or plastic. It will work out in the same way as in the case of a fabric collar, using felt as a sealant.
With your own hands
It is not always possible to quickly select a ready-made medical collar of the required size and dimensions. In addition, it is possible that a protective accessory is needed urgently, but there is no time to search and purchase. There is only one way out - to make an E-collar with your own hands.
We will look at the most popular models of homemade collars and tell you how to make them at home.
The most popular materials for this barrier protection product are:
- cardboard;
- lightweight plastic;
- plastic bottle;
- textile.
Cardboard
The simplest and easiest way to make a collar for a cat.
A cardboard structure can be built in a hurry when an animal urgently needs protective equipment. The model is not suitable for long-term use, but it can cope with its task within a few hours. In the future, industrial designs or collars made of other materials should be used: plastic, soft fabric.
To make your own cardboard collar you will need: cardboard, tape and lace.
How to make a cardboard collar:
- Take thick cardboard. Boxes from household appliances or shoes will do.
- Take measurements from the cat - neck circumference (measurement No. 1) and neck length from the collar to the tip of the nose (measurement No. 2).
- Draw a cone on the cardboard with the length of the inner circle equal to the circumference of the neck (+2.5 cm). The width of the product will be equal to the second measurement (+2.5 cm).
- Cut out the collar according to the drawn pattern.
- The edges of the cone must be treated with tape.
- Using a lace, fasten the parts of the cone.
- For ease of wearing, make loops for the collar.
You can use a stapler, sticky tape or tape to secure the edges of the cone.
Video
Made from lightweight plastic
A more solid and reliable design is made from lightweight plastic. Such a collar is not inferior in its characteristics to finished plastic products.
To make a plastic collar you will need: a stationery folder or a flexible cutting board, tape or wide adhesive tape, a stapler and a textile fastener (Velcro).
How to make a collar from lightweight plastic:
- The pattern for the product is made in the same way as for a cardboard model.
- A cone is cut out from a stationery folder or cutting board according to the pattern, adding 2-3 cm along the edges to adjust the size.
- Sharp edges are treated with adhesive tape or tape.
- The textile fastener is attached to the plastic edges of the cone using a stapler.
To make it easier to fix the product on your cat, you can improve the design by cutting or constructing loops for the collar.
Video
From a plastic bottle
Models of Elizabethan bottle collars are popular among cat owners - this material is found in every home. Bottle plastic is transparent, flexible and durable - collars made from them will last a long time.
For a plastic bottle collar you will need: a water bottle, tape, adhesive tape or string.
How to make a collar from a plastic bottle:
- Choose a transparent bottle of the appropriate size.
- On the side of the neck, a marker marks a diameter equal to the circumference of the pet’s neck.
- The neck is cut off and the length of the cat’s head is measured (measurement No. 2).
- The rest of the bottle is cut along the marked line.
- So that the product can be put on a cat, the cone is cut lengthwise.
- The lacing is threaded along the cutting line into pre-made holes or a Velcro fastener is attached using a stapler.
To prevent the animal from injuring itself, all sharp cuts are sealed with adhesive tape or tape.
Soft fabric collar
Not all cats will like hard plastic and cardboard structures. Capricious pets will like soft fabric products more. The collar is sewn from cotton fabric to minimize possible allergic reactions. Linen or cotton is best suited for this purpose.
To create a more dense structure, a cardboard or plastic base is placed between strips of fabric, and the collar is stuffed with padding polyester or cotton wool.
The simplest collar can be sewn using the pattern that was used for the cardboard and plastic versions. Don't forget to add 1.5 cm at the seams. Along the cut line, the edges of the collar are secured with adhesive tape.
Collar made from scrap materials
An interesting video about how to quickly make an Elizabethan collar from disposable paper plates.
How to do it?
There are times when there is simply no opportunity to buy this device. But you don’t have to worry about this, since it’s easy to do it yourself. You don’t need various tools that only masters have; everyone has everything they need in their home. To create a collar you can use items such as:
- cardboard;
- plastic bottle;
- a flower pot.
When making this accessory, you will also definitely need a comfortable, wide and not very stiff collar to attach the collar to. You can also use a harness. In this case, the load will be placed not only on the neck, but also on the spine, which will greatly facilitate the wearing period. By following the instructions, you can easily make an Elizabethan collar.
Made from lightweight plastic
This option is the simplest. For it, you can take the simplest stationery folder. If you cut it, you will get a fairly long piece. For this design you will need:
- adhesive tape, adhesive tape or double-sided tape;
- stapler with large staples.
Before you start creating, you need to take measurements: the diameter of the neck and the distance from the neck to the tip of the nose. Then we take a sheet and draw two circles on it. The smaller one is the neck. And in order to draw a larger circle, you need to measure the length of the head from the smaller one, but 3 cm higher than it is. Then inside the small circle we draw the next circle, it should be 3-4 cm smaller, the collar will be attached there.
Next, cut out the sample and don’t forget about the reserve. If you are in doubt about the length, then cut the circle longer, and then simply shorten it. We draw a straight line from the edge to the center and cut out a sample along it, a small circle. Its also a mode of 5-6 times perpendicular for future loops.
The sample is ready, now we try it on the pet. We adjust if necessary. Then we put the pattern on the plastic and transfer all the measurements onto it. We fold what we did for the loops in half, secure it with a stapler and secure it with adhesive tape so that the ends of the staples do not get in the way. And we insert a collar or harness there.
Let's try on the collar again. If everything is good, then we connect it in the place where the cut was made and fasten it with a stapler or double-sided tape. The main thing to remember is that you will also need to put a collar on your pet. If he has a bandage on his head, then do not secure it with staples. Please pay special attention that the distance between the collar and the neck should be no less than your finger. If it is smaller, it will rub and cause discomfort, and if it is too large, the animal will easily remove the collar.
This is the easiest way to create an Elizabethan collar at home. There is no need for any special skills or various equipment. The only drawback is poor strength. The collar will fit while the animal is recovering from anesthesia, but after that the cat will begin to actively move and itch, and due to such actions the collar may not be able to withstand it.
If you have thin plastic (soft cutting board), then you should give preference to it. The collar will be more reliable, and its edges can also be processed so that they do not cause inconvenience.
From the bottle
The main task when creating a cat collar from a bottle is to choose the right container of the right size. For these purposes, two-liter bottles are mainly used. Where the neck is located, we find the diameter that best suits the circumference of the animal’s neck. Then we decide on the length and make marks. Cut off the neck. And according to the marks we cut out the future collar. The result was a cone. And to put it on the animal, you need to make a vertical cut.
Holes must be made on both sides of the cut for lacing. They can be made with a screwdriver or scissors. And to make it easier to do, the tool can be heated with fire. You can also make lacing with a gypsy needle. Before inserting ropes into the holes, they must be treated or covered with adhesive tape. Because if this is not done, the cuts can harm the pet.
If you do handicrafts, you can improve this accessory by simply sewing a soft case . Then you need to attach loops to the neck collar into which the collar will be threaded. Even if your cat is not very active, you still need to secure the structure well. All edges must be soft.
If you choose this option, then you will definitely need to check that your pet can eat, sleep and spend his time actively. About an hour after putting the collar on, remove it and check if it is rubbing. If you find traces, then it is worth adjusting the structure.
Using the same pattern, you can make a collar from a flower pot.
From cardboard
This collar option is very easy to assemble. Cardboard will fit from any box. You will need to take cardboard and cut a semicircle out of it, the same length as the collar on which it will be attached. This can be done using tape, a stapler or a needle and thread. The edges may turn out to be a little long and will overlap each other. But there's nothing wrong with that.
To make a more reliable neck collar, you will need the same tools as in the previous version: scissors, a stapler and tape. The pattern for the future collar is suitable for any option. Also take measurements: neck diameter and distance from neck to tip of nose. We make a similar diagram using the taken measurements, transfer it to paper and cut it out.
We try on the sample and adjust it if necessary. When creating such an accessory, you need to use thin cardboard. Then we transfer the shape to cardboard, cut out and fasten the loops. Then we thread a collar or harness through them. Let's try it on again. When the edges are longer, it is more convenient to put on the collar when it is open.
This collar is suitable if the animal’s head or part of it is damaged.
Made from soft fabric
If your pet has to wear this collar for a long time, then you just need to take care of comfort. Cats quickly adapt to eating and drinking in such a device, but they are still uncomfortable sleeping in a plastic collar. Of course, a fabric collar is more difficult to sew, but it has three big advantages:
- lightness – there is less strain on the neck;
- softness – does not interfere during any actions;
- washable.
This type of collar should be sewn from cotton or linen. Since this fabric is easily deformed, rigid posts (pieces of plastic) or reinforcing materials can be used to keep it in shape. A fabric collar should have 2-3 layers. The edges are trimmed with fringe. When creating this option, the same dimensions are measured as in other cases, but the length can be made shorter.
Where there is a cut, we fasten it with Velcro or make lacing (you must leave a reserve). Before you start sewing, prepare the loops for the collar; they should be made of soft fabric and quite wide (there will be less strain on the neck). The disadvantage of this option is that such a collar does not hold its shape well if the animal constantly tries to remove it.
But you can make sure that this device covers only the cheeks, and so that the animal does not remove the collar, it needs to be secured more firmly, but not overdo it.
This is interesting: Can neutered cats eat fish?
How is surgical castration of a cat performed, are sutures required?
This procedure involves the removal of the animal's reproductive organs (testicles). After castration, he ceases to experience attraction to the opposite sex and, accordingly, is not able to have offspring.
The operation includes the following steps:
- Introducing a four-legged patient into anesthesia. Anesthesia can be non-inhalational, inhalational, local or combined. Its type depends on the condition of the animal’s body and the surgical protocol adopted in the veterinary clinic.
- Shaving or plucking fur in the work area.
- Treating the surgical field with an antiseptic. 70 percent alcohol, 5 percent iodine solution, etc. are used as an antiseptic.
- Incision of the skin of the scrotum with a scalpel.
- Extraction and removal of testes.
- Treating incision sites with an antiseptic.
During castration, it is important to prevent bleeding. To prevent it, the following methods are used:
- ligation of the spermatic cord, which involves ligating it with absorbable or non-absorbable suture material;
- a biological knot, the essence of which is to tie the spermatic cord into a knot without using a ligature.
Indications for a cat to wear a protective cone
An Elizabethan collar is worn on a cat when:
- diseases of the ears and eyes - constant scratching and licking of medications interferes with recovery;
- injuries - to prevent infection;
- infectious and parasitic diseases - to avoid repeated self-infection;
- during abdominal operations, including castration, sutures must be protected from infections and mechanical impact with a rough tongue;
- treating skin and wool with external antiparasitic and antifungal drugs that have a toxic effect.
Cardboard collar
Cardboard collars are quite quick and easy to make yourself. But keep in mind that such a design is not particularly reliable and will not last long.
For the collar, choose the thickest cardboard possible. Next we proceed according to the following scheme:
- After drawing, cut out a semicircle.
- Carefully roll the workpiece into a cone.
- Having tried on the “new thing” on the cat, we adjust it to size.
- We glue the sections several times with tape. Glue fabric strips on top.
- Since the cat will wear the accessory for about a week, use laces to secure it.
- Attach loops along the edge of the collar and thread the collar through them.
As you can see, making a collar for a cat is absolutely not difficult. The main thing is to initially make the correct pattern for the future protective structure.
Scrotal swelling
If there are no medical indications, then the scrotum is not removed during castration of a male dog. Immediately after surgery, this leather pouch remains empty. Doctors may briefly apply a heating pad with ice to the scrotum to cause the blood vessels to constrict.
Bulldog after castration
True, this takes time. But the body does not tolerate any emptiness and strives to fill it. Therefore, lymph can accumulate in the scrotum. On the third or fourth day, it looks as if the testes have returned to their place! This is fine.
Sometimes the swelling can be too strong and painful. This happens in several cases:
- Blood clots had accumulated in the scrotum because a vessel was damaged and not ligated.
- The wound became infected and inflammation began.
- Rejection of the suture material occurs (the latter situation is extremely rare; usually the problem is a violation of sterility).
In which case should you see a veterinary surgeon as soon as possible:
- the scrotum is purple or bluish in color;
- the swelling is so strong that the scrotum is larger in size than before the operation, the skin is stretched;
- discomfort when walking in a dog, signs of pain.
We invite you to read the Description of the Jack Russell Terrier breed with photos and videos: character, what to feed and how long they live, choice of puppies and reviews from owners
The doctor may prescribe novocaine blockades with an antibiotic or systemic antibiotics; sometimes surgical revision of the wound is required (under local anesthesia).
This Labsky (Labrador and Husky mix) was neutered at 7 months.
You can see more photos of Labski HERE (link will open in a new tab)
Scrotal swelling
If there are no medical indications, then the scrotum is not removed during castration of a male dog. Immediately after surgery, this leather pouch remains empty. Doctors may briefly apply a heating pad with ice to the scrotum to cause the blood vessels to constrict.
Bulldog after castration
True, this takes time. But the body does not tolerate any emptiness and strives to fill it. Therefore, lymph can accumulate in the scrotum. On the third or fourth day, it looks as if the testes have returned to their place! This is fine.
Sometimes the swelling can be too strong and painful. This happens in several cases:
- Blood clots had accumulated in the scrotum because a vessel was damaged and not ligated.
- The wound became infected and inflammation began.
- Rejection of the suture material occurs (the latter situation is extremely rare; usually the problem is a violation of sterility).
In which case should you see a veterinary surgeon as soon as possible:
- the scrotum is purple or bluish in color;
- the swelling is so strong that the scrotum is larger in size than before the operation, the skin is stretched;
- discomfort when walking in a dog, signs of pain.
We suggest you read how long pregnancy lasts in Scottish cats and how to care for them
The doctor may prescribe novocaine blockades with an antibiotic or systemic antibiotics; sometimes surgical revision of the wound is required (under local anesthesia).
This Labsky (Labrador and Husky mix) was neutered at 7 months.
You can see more photos of Labski HERE (link will open in a new tab)
Signs of possible postoperative complications
Castration performed in compliance with the rules of asepsis and antisepsis and competent postoperative care do not always guarantee the absence of postoperative complications. The presence of the following signs may indicate the development of complications:
wound bleeding;
unpleasant odor, purulent discharge from the wound;
increase in body temperature above 39.50 C after 5 days from the date of surgery;
lethargic, apathetic state, refusal to feed, lack of thirst for 3 days after castration;
constipation, inability to urinate for 3 to 4 days.
If at least one of the signs occurs, the pet must be shown to a veterinarian.
The first day after surgery
Regardless of what anesthesia was used, the dog's body temperature decreases during the operation. The smaller the dog, the more it cools down
If the clinic uses special heating pads, that’s wonderful, but even after waking up, it’s very important to make sure your pet doesn’t get cold. Be sure to bring a warm fleece blanket to wrap or cover your dog
Feel your paws and ears - how cold are they?
Create a cozy nest at home and eliminate drafts. Warmth and peace are the best conditions for a male dog’s recovery after castration.
You cannot leave your dog on the bed/sofa! Coordination of movements after anesthesia may be impaired, which can lead to injury. Only on the floor!
Labrador recovers after castration
There is no need to rush to water or feed your pet, and even more so, you should not force something into the mouth. Let the water be freely available; if he wants, he can drink. Your doctor will tell you when you can feed; recommendations differ depending on what kind of anesthesia was used. The minimum fasting diet is 4 hours (after inhalation anesthesia), 6-8 hours after intravenous anesthesia, and 10-12 hours after intramuscular anesthesia.
Give your pet not a full portion, but a quarter. If he doesn't vomit within an hour, feed another quarter. It's enough. You can give a full portion at the next feeding.
The main rule is no exotic delicacies. Wanting to console or pamper the dog, owners sometimes buy expensive canned food or allow him to eat a piece of sausage. The only thing you will achieve is disruption of the digestive system. Food should be familiar. If he ate dry food, let him eat it, there is no need to soak it. The pet's testes were removed, not his teeth.
Wearing rules
The cat needs the accessory after surgery; if worn correctly, it can be removed in 3-5 days.
To prevent the cat from being able to remove the collar, when choosing and purchasing a product, you need to inspect the fasteners and evaluate their reliability. When putting on the accessory, adjust it so that the headband does not tighten the neck, but is not too loose, otherwise the pet will take it off. If your cat has experience wearing a collar, it will be easier to put a neck post on him.
We can recommend purchasing a product made of hard fabric with padding - these models are more elastic than hard plastic ones, but they will prevent licking no less effectively. When wearing a protective collar, the following rules must be observed:
- do not remove the accessory while the animal is sleeping;
- do not leave the cat unattended if for some reason the stand had to be removed;
- do not try to loosen the collar if you can stick a finger between it and your neck;
- If you refuse to feed due to putting on the stand, you will have to remove the object that is bothering the cat only for the duration of feeding (according to the schedule).
It is recommended to encourage animals more often during the entire period of wearing the collar: pet them, talk affectionately, give them treats.
How to wear?
There are times when the veterinarian did not put a collar on the animal or when you made one yourself. In such cases, the question arises: “how to put it on correctly?” To do this, you need to follow some simple rules. First, you need to measure the cat's neck so that the collar fits. It should not dangle, but also not put pressure on the neck.
Then prepare the collar. Attach it to a collar or piece of soft cloth. If the animal is scared, then take it, wrap it in a soft towel and calm it down. You need to put on the collar very carefully so as not to cause harm. Many animals do not like having foreign objects put on them, and cats can behave aggressively. In this case, you will need an assistant.
Then you will have to hold the cat by the scruff of the neck. Once her head is in the collar, try to calm her down. Then attach the collar to your neck. Check that nothing is pressing or loose. There should be a finger space between the collar and neck.
The collar can only be removed with the permission of a veterinarian.
Making an Elizabethan collar for cats with your own hands
If you don’t have the opportunity to visit a pet store, and you need a protective cone yesterday, make it yourself. This does not require special talent, so anyone can cope with the task. You just need to follow the instructions, which explain in detail how to make a collar for cats with your own hands from cardboard, a plastic bottle and other materials that are at hand.
Made from cardboard - disposable
A disposable collar is suitable for the anti-flea procedure - to prevent the cat from scratching or licking the product. It is also useful for one-time manipulations. The maximum period for wearing a cardboard accessory is 3 days.
What you will need for production:
- 2 sheets of A4 cardboard;
- ruler;
- a compass or round object - for example, a jar lid;
- marker, pencil or pen;
- scotch;
- scissors.
The whole job will take no more than 5 minutes.
Step 1.
Prepare all the tools. Find the middle on the long side of the cardboard sheet.
Step 2.
Starting from the found middle, draw a semicircle using a lid or compass. The radius for a medium-sized cat will be 6 cm, but after trying on everything will be adjusted.
Step back about 10 cm from the inner semicircle and draw an outer semicircle.
Step 3.
Cut out the workpiece - it turns out to be ½ circle. Now, placing it on the second sheet of cardboard, outline and cut out ¼ of a circle.
Step 4.
Connect the cut with tape. You should have ¾ of a circle - that is, a full collar.
Step 5.
Try the collar on the animal. If it’s too tight, move it a little away from the inner radius. Do not start with large numbers - often it is enough to step back from the edge by 0.5 cm.
Step 6.
Place the accessory on the animal and secure with tape.
Made from plastic - reusable
You can make a plastic protective product in exactly the same way. Plastic can be purchased at any office supply store. This collar is enough for several times of use, and even the most dexterous cat will not tear or remove it.
The only downside is that you can’t secure it with tape, so you’ll have to make holes and lacing (see below, in the section with the bottle).
From a bottle - in a hurry
A collar made from a five-liter bottle is used many times and is in no way inferior to a store-bought one. In addition, it is very durable - the cat will not be able to damage it and remove it. It will take 5-10 minutes to make.
What materials will you need:
- five-liter clean and dry bottle;
- marker - such that it does not rub off from the plastic;
- scissors;
- scotch;
- awl;
- ribbon or lace.
The operating procedure is as follows:
Step 1
Cut off the top of the bottle, leaving about 2 cm from the neck.
Step 2
Make a vertical cut. This will make it easier to cut off the bottom of the bottle later.
Step 3
Where the expansion of the bottle ends, cut off the bottom.
Step 4
Cover the inner side (the one that will be in contact with the cat’s neck) with tape so that the sharp edge does not injure him.
Step 5
Also, for safety reasons, round the corners on the outer edge where the cut goes.
Step 6
Make holes for the lace along both edges of the vertical cut. The optimal distance between them is 2-3 cm.
Step 7
Thread the ribbon or string through.
Step 8
Lace everything up well. Then loosen the lacing a little, put the collar on the cat and tighten the tape. Lacing directly on an animal is a disastrous idea.
From fabric
It is made on the basis of a pattern for a plastic cone, but requires fixing the shape. You will need to make a special cardboard frame or plastic insert to give the finished product stability. At the very end, cover the structure with linen or cotton fabric. You can make the protection softer by quilting the collar - using padding polyester or special materials.
This option puts virtually no strain on the neck, so cats quickly get used to it. If you don’t know how to sew, contact a craftsman you know or the nearest studio and ask to make a custom-made accessory.
Conclusion
A cat collar is a reliable means of protection that can be useful in many situations. When purchasing, consider safety and convenience, since aesthetic appearance is not at all important for the animal. But if your soul persistently demands beauty, make sure that the chosen option does not cause negative emotions in your pet, since it will be he who will wear it.
The article is a recommendation!
How long to wear a collar after castration
You need to wear a collar after castration until the postoperative wounds have completely healed. As a rule, this period does not take more than 6-8 days, with proper care during the rehabilitation period.
If the cat experiences discomfort, remove the collar for a while, for example, before feeding. You can remove the protective accessory for 20-30 minutes. At the same time, after removing the special device, do not leave the cat unattended. Feeling free, the cat will begin to lick the wounds.
Inspect and treat wounds daily with an antiseptic, lubricate with brilliant green and ointments that speed up the healing process. If the cat's condition is unstable, consult a veterinarian.
If the wounds heal quickly, reduce the period of wearing the protective accessory by one or two days, while continuing to monitor the actions and condition of your mustachioed pet.
When to use
Initially, the veterinary collar was a post-operative accessory, but the scope of the protective collar for cats has expanded over time. This means of barrier therapy is used both in a hospital hospital setting and at home.
When to use a collar
- After castration and sterilization operations, so that the animal does not lick the stitches, irritating the wound.
- After treating open wounds with ointments and powders to prevent the animal from licking them.
- During the course of treatment for ear mites, prevent your pet from scratching its ears.
- After treating the animal’s coat with antiparasitic agents: sprays, drops, shampoos. The cat will not be able to lick off the harmful medicine.
- If your pet is sick with lichen or another fungal disease and needs to treat the affected areas with antifungal ointments.
- After a fight or injury, if the cat needs treatment for scratches and wounds.
- In the postoperative period - after any abdominal surgery, injuries of the limbs and spine, traumatic brain injuries.
- During the treatment of allergic and infectious skin diseases.
- After eye surgery and time of treatment of ophthalmological diseases.
Why do you need a veterinary collar for cats?
This barrier protection product performs the following functions:
- Prevents the cat from removing post-operative dressings.
- Protects seams and open wounds from infection and injury.
- Allows medications (ointments, drops, powders) to be absorbed.
- Protects fastenings of metal structures in case of limb fractures.
- Prevents the licking of toxic medications (anti-parasitic drops).
- Protects the cat's head from scratches and scratches.
- Does not allow the bandage to be torn off from the head and eyes.
How long should you wear the collar?
The cat cone is used as prescribed by a veterinarian and is not removed from the animal until the wound has completely healed. Depending on the severity of the wound, the wearing period can range from several days to several weeks. During this period of time, the animal should not be allowed outside.
Wearing a special collar increases the effectiveness of many therapeutic measures and promotes a speedy recovery of the cat in the postoperative period.