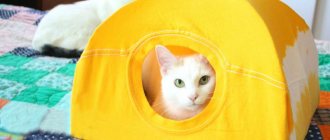
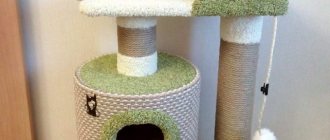
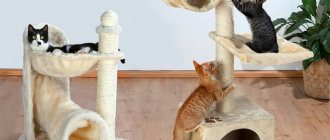
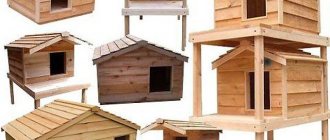
How to make a house for a cat with your own hands? - Very simple! If you have the bare minimum skills in handling tools and the desire to make a cat house with your own hands, then everything will definitely work out. Making a scratching post for cats with your own hands is quite simple. And such houses for cats will cost much less than ready-made ones. In order to make a cat house with your own hands, we will need:
- boards/chipboards, etc. (it is advisable to use natural material);
- pipes (cardboard/plastic or something else);
- sisal rope (you can use jute, but it will fray faster and require replacement);
- fur (it is better to take a denser texture so that fibers do not fall out during use);
- corners;
- furniture stapler.
When making complexes for cats with your own hands, give preference to natural, environmentally friendly materials.
Houses for kittens (complexes for cats) made of artificial materials smell bad for our pets, and they are also toxic. I don’t have a lot of space in my apartment, so I chose a free corner - this is the best option: it doesn’t take up space and doesn’t interfere with walking, and it increases the cats’ play space. So, how to make a house for a cat with your own hands ?
STEP BY STEP WE MAKE A HOUSE FOR A CAT WITH PHOTO:
Step 1. Take boards/chipboards, etc. Cut to size.
Step 2. Attach the corners.
Step 3. Take fur and a furniture stapler and sheathe our future shelves. You can put 1-2 layers of synthetic padding under the fur (optional).
This results in a shelf like this:
Step 4. We hang the finished shelf on the corners. We do the same with the rest of the shelves as planned.
Step 5. Take pipes that can be inserted between the shelves or, as in my case, on the side as an additional scratching post and exercise machine for cats. It is necessary to think in advance about the design of attaching the pipe to the shelves or to the wall. The thicker the pipes, the more rope you will need, so if you want to save money, take pipes with a diameter of 5-7 cm.
Step 6. If you attach the pipe to the floor (as I did), you can make a small platform under the pipe, so it will be more stable and will look more aesthetically pleasing. We attach the corners to the pipe and fasten them to the platform. I also put a piece of linoleum on top.
Step 7. Wrap the pipe with sisal rope.
HOW TO CALCULATE HOW MUCH ROPE YOU NEED FOR A CLATCHING POINT?
Now we remember school mathematics and count the amount of rope depending on the length of the pipe. Let's calculate using my example:
- We measure: Pipe diameter 10 cm.
- We multiply: pipe diameter x pi number - i.e. it turns out 10 x 3.14 = 31.4 cm - this is the length of the rope that will be needed for one circle. Taking into account the thickness of the rope, it turns out a little more (for me it was about 38 cm per 1 turn).
- We calculate: The thickness of my sisal rope is 8 mm. It turns out that for about 10 cm of the length of the pipe - 10 circles of rope, since there are small gaps between the circles of rope (here it all depends on the thickness of the rope you take), i.e. 10 x 38 = 380 cm (3.8 m of rope per 10 cm of pipe length).
- Let's calculate: The length of my pipe is 2.3 m. If we assume that there is 1 circle per 1 cm of pipe length, we get 2.3 m per pipe = 230 circles (if the rope is 6 mm thick, there will be more circles): 38 cm (length of rope for 1 lap) x 230 laps (number of laps of pipe) = 8740 cm = 87.4 m of rope for my entire pipe. It took me about that much sisal rope.
It is better to take a rope with a small reserve!
So, wrap the pipe with rope:
I wrapped the end of the rope a little with thread to prevent fraying. We screw the end of the rope to the pipe with a screw and begin to wind it. I will say right away that this is not an easy matter. You need to do it together. One holds the pipe, the other pulls it tightly, and this should be done as tightly as possible to the pipe. After every 10-15 laps, be sure to “compact the rope down” with a hammer and screw the rope with a screw (we do this from the side where it will not be visible). If you don't compact the rope properly, it will slide down after a few days.
We attach the corners to which the shelves will be attached to the pipe at the required height, and hide these corners under the rope.
I lined the end of the pipe with fur. When finishing winding the rope, you need to go a little deeper into the fur and secure the rope well with screws.
Step 9. We cut holes in advance for the corners in the shelves and thread the corners that we have on the pipe into them.
Step 10. We secure the pipe well. And enjoy the result!
I made shelves on the wall and the side of the cabinet along its entire height, now the cats have the opportunity to also be on the cabinet. I still had some fur and padding polyester left, so I made a bed and put it on the closet.
Now our cats are exploring their new spaces!
We’ll also talk about interesting additions to the gaming complex.
HAMMOCK FOR A CAT WITH YOUR HANDS
You can provide a hammock for your cat in the house: they usually like to curl up in a ball and sleep rocking. You can also make a hammock for a cat on a radiator or on a radiator.
Making a hammock for a cat with your own hands is quite simple: for example, take 2 slats, nail them between the posts of a cat house, and wrap the ends of fabric or fur around the slats and secure them with a furniture stapler. This hammock for a cat can be made under a chair or in any other place.
You can make a hammock for a cat from a pillow, synthetic padding, foam rubber, fur or just thick fabric.
We measure and cut parts
We used a pencil to mark the PVC and cut it all with a pipe cutter. If you don't have one, you can easily use an electric jigsaw.
You should have the following details:
- three PVC pipes, cut to 25 centimeters;
- 12 PVC pipes, cut to 23 centimeters;
- 21 PVC pipes, cut to 30 centimeters.
We cut a large cardboard tube in half, making two tunnels with a diameter of 60 centimeters. We measured 60 cm, made a mark on the cardboard tube and cut it with a utility knife. You can also use a handsaw.
Popular models, description, characteristics
- Trixie tunnel for cats beige plush - the best model for medium-sized cats;
- Triol play tunnel for cats made of nylon;
- Triol 3005NT play tunnel - a model for those who have children;
- PAWZ Road S-shaped collapsible tunnel for animals - the best model from the aliexpress website;
- Speedy pet leopard triple tunnel - a model for owners of several cats;
- Triol Scratching post “Tunnel with a toy” is the best model for kittens.
Compact soft tunnel for cats made of plush fabric. Can be used as a cat house or bed. Dimensions: length – 60 cm, diameter – 22 cm. Suitable for kittens and small cats. The design is discreet - there is a brown cat's paw print on the beige plush. A rustling material is sewn under the fur lining to attract the animal's interest. The tunnel keeps its shape thanks to the rings sewn into the plush.
- Pro: compact size.
- Minus: no windows.
Price: 1004 rub. More details about the product
A bright and long play tunnel made of practical and lightweight nylon for kittens and active cats. Has two windows and a fluffy bell for cat games. It rustles thanks to the sewn-in filler. The fabric has wide stripes of red and gray. Keeps its shape thanks to the built-in metal frame. Can be used indoors and outdoors. The exit from the tunnel can be tightened with ribbons.
Dimensions: length – 130 cm, diameter – 25 cm.
- Plus: easily folds into a ring for storage and carrying.
- Minus: no sleeves.
Price: 846 rub. More details about the product
This popular model of original design is an excellent playground for cats and a designer decoration for your apartment. The tunnel is made of soft beige plush in the shape of a lying dog. The shape of the product is supported by sewn-in MDF rings. The toy has two windows that imitate the paws of a dog. The color is nice peach. The tunnel rustles thanks to the gasket sewn into the product.
Product dimensions: length – 100 cm, diameter – 25 cm.
- Plus: children like the design of the toy.
- Minus: light fur gets dirty quickly.
We suggest you read: Diabetes mellitus in cats, symptoms and treatment
Price: 2036 rub. More details about the product
A collapsible long tunnel with an original S-shape made of nylon. Available in three colors: brown, gray and blue. It has a curved shape, two windows, and a rustling texture. The shape of the tunnel is supported by metal rings. The toy folds into a ring for storage and transportation.
Product dimensions: length – 120 cm, diameter – 25 cm.
- Plus: can be purchased on Aliexpress at a discount.
- Cons: not durable.
Price: 1278 rub. More details about the product
A toy in the shape of a trefoil - three pipes (length 55 cm, diameter 25 cm) sewn together, in the middle there is a window directed upwards. The leopard-print fabric is very durable, the seams are well stitched. There are rustling inserts between the material and the lining. The shape of the product is supported by a strong spring that can withstand the weight of large cats. The tunnel has fastenings that can be connected to similar products, expanding the playing space.
- Plus: suitable for several cats playing together.
- Cons: high price.
Price: 2821 rub. More details about the product
A fun play set for kittens - a small slide with a tunnel made of MDF with sisal coating and carpet edging. At the top of the slide there is a soft toy attached to a spring, and a tassel is suspended inside the tunnel. The kitten sharpens its claws while playing.
Product dimensions: tunnel diameter – 26 cm, scratching post length – 26 cm.
- Plus: natural antibacterial sisal coating.
- Disadvantage: high cost.
Price: 1505 rub. More details about the product
Range
A variety of tunnels are presented in the form of different designs, dimensions and materials of manufacture.
- compact models - primarily performing the functions of a shelter and sleeping place for a pet, their length is limited to 30-50 centimeters, are made of soft and cozy fabrics, and are available on the website in the assortment of the Fauna Int and IPTS brands;
- play structures - give animals more space, are made from soft and rustling fabrics that provoke the cat to play, are equipped with additional moves and branches, are presented in the Triol, Ferplast, Zolux, Trixie and Dezzie lines;
- modular tunnels - can be used independently, as well as as part of labyrinths and playgrounds, have spacious dimensions with a stroke diameter of 40 cm, are additionally equipped with toys and scratching posts, you will find the most complete range at Kitty City.
Durable and high-quality materials are used to make play tunnels for cats:
- plush is a soft and warm fabric that does not cause allergies;
- nylon is a traditional dense and durable fabric that can withstand active movements;
- polyester is a hypoallergenic material for making rustling structures, it is wear-resistant and durable.
Also, most models are available in several color options, allowing you to choose the most suitable design for your interior.
Assembling the top and bottom parts
For the bottom and top layers we will need:
- (4) 2.5cm PVC elbow fitting;
- (2) 2.5 cm PVC tee;
- (4) 2.5 cm PVC pipe, cut to 23 cm;
- (3) 2.5 cm PVC pipe, cut to 30 cm for each layer.
We connect PVC pipes and fittings. We focus on the photos presented in the article.
25 children of a childless man: an extraordinary reunion
The newlyweds traveled all over the world and took wedding photos in every country
“Olga” from the series of the same name: the tragic fate of actress Yana Troyanova
How to choose?
When purchasing a play tunnel, the cat owner has to think through a number of nuances. For example, the key one is the size of the animal itself. No matter what difficulties the cat likes, he must move freely inside the tunnel without getting stuck. At the same time, the design itself must be reliable . No matter how the animal uses it, it should not create a situation in which the pet could become stuck inside.
If there is little space in the house, you have to limit yourself to small structures. In this case, you can select a combined type of product. For example, it could be a sofa tunnel. If the owner is not satisfied with this solution, it is worth taking a closer look at vertical type modifications. Without losing functionality, they are compact in placement.
The product is selected taking into account the space allocated for it. Tunnels are not placed on the passage, because at some point in time the owner may get distracted and, continuing to walk by inertia, step on the tunnel with an animal inside. It is better if the tunnel fabric is dense and the frame is rigid.
The number of holes also matters: the more, the better. A pet can sit in ambush for a long time, so access to air is extremely important for it. Their diameter must be sufficient so that the animal, if necessary, can jump out of the tunnel. The edges of the holes should be edged with soft material.
You should not underestimate the age of your furry pet. For an active young cat who does not know boredom, it is worth choosing a complex design consisting of several levels or connected pipes with turns. For an old cat, it is better to buy a soft plush tunnel of short length. In it, the animal will be able to relax and take a break from the attention of household members.
It is recommended to choose textiles that will be pleasant to the touch (without rustling pads sewn inside).
A playful pet needs options with hanging toys. In addition, they will be happy to study rustling materials. You can choose an option consisting of contrasting textiles, in which individual sections are made of rustling material. Cats also like some sliding materials that resemble the surface of a floor covering. You can buy a product that tapers towards the end, having different diameters of the two main entrances.
Design and color
Manufacturers of accessories for cats offer customers both standard and unusual tunnels for pets of different sizes and weights. For example, manufacturers produce designer models in the form of original toys. In more familiar versions, the tunnels have a spectacular print and bright color. Some varieties are made of mesh material, while others have a fur edging.
The tunnels look original in the form of giant mice with paws and a muzzle located above the entrance. Transformable products that can bend deserve special attention - this allows the cat to climb from one floor to another. Other varieties can transform, changing shape.
Some products have a step at the entrance, others are made in the form of a huge capsule. Still others, when transformed, turn into houses, while others do not have a rigid frame that holds their shape. These varieties are good for cats who love difficulties, because the pets in them are happy to make their way with their muzzle.
The color schemes of tunnels for cats can be very diverse. They are not limited by the desire of the buyer, so on store shelves today you can buy products in any shade of the palette, including white, pink, orange, sand and products with bright contrasts.
At the same time, modifications with patterns in the form of cat’s paws decorating the outer part of the tunnels are especially popular among buyers.
Varieties
Cat tunnels can be classified according to several criteria. For example, they differ in the material they are made of. On the shelves of specialized stores for cats today you can buy products made of fabric, fur and even plastic. In addition, the tunnels are often equipped with linings, which can be standard or deliberately rustling - this attracts the attention of cats who adore such things.
In addition, different types of structures themselves can be distinguished into separate lines. Depending on this, they are straight or curved. According to the type of direction, modifications are divided into vertical and horizontal. This is convenient, since owners will be able to choose the most unusual options for their pets, taking into account the temperament and level of activity of their cats. In this case, products may differ not only in internal diameter, but also in length.
DIY cat toys: From simple to interactive
How to make a soft toy for a cat
To prepare the material for the ears, the fabric is folded with the wrong side inward, interlining is placed between the layers and ironed.
When the stuffing is completed, the tail blank is inserted into the remaining hole with the raw edge. Everything is sewn together with a hidden seam.
Another option for a soft toy
It is not advisable to use tape in this situation, as it is less secure and may pose a health hazard to the cat if it swallows it.
What is an interactive toy
They are intellectual entertainment where the cat has to go around an obstacle to get to the treat.
This interactive toy is easy to make with your own hands. This woodpile will look original next to cat furniture.
A complex labyrinth made from improvised means
To take care of their pet, some owners buy comfortable carriers, clippers, closed trays, collars , and in order to entertain them, they build complex game labyrinths.
Although it will take more time to make such a toy for a cat with your own hands, you will only need available materials for it.
You can see ideas using egg containers, parts cut out of plastic bottles, yogurt cups and much more.
The simplest and most accessible
A ball of thread. It is unlikely that any kitten (or even an adult cat) will remain indifferent to it. To prevent the ball from unwinding and the kitten from getting entangled, it is recommended to secure the end of the thread.
In order to make a tunnel for cats with your own hands, you need to be patient and time. It is necessary to purchase a special corrugated blank, which must be larger than the size of the cat so that he can walk through it completely calmly and without obstacles. Nowadays you can find a large number of different pipes in different colors on the market, so the choice will depend only on the wishes of the cat’s owner. Then you should connect one end of the pipe to a regular cardboard box. This can be done using special metallized tape. You can make a few more holes in the box and attach pipes to them,
Original example
Cats are always up to something, which is why the owners of one of them decided to transfer her energy into a peaceful direction. They built a secret cat tunnel in a private home in San Francisco so that their furry friend can walk around the entire room without ever stepping on the floor or computer keyboard. After all, she has her own shelter in the steampunk style. This design looks absolutely stunning, reminiscent of Kathryn Bigelow's early work. Using the right materials and tools, you can make a tunnel for your cats and your pets with your own hands. Checked: everyone will have fun.
First, think about where exactly to build the cat tunnel. The Californian design bureau Because We Can, whom the cat's owners contacted to implement their plan, decided to build a tunnel around the perimeter of the room, hanging it on large hooks.
When looking for a suitable place, think about what your cat likes to do. Most of them love to hide, peek out from hiding places, jump on tall pieces of furniture and look down on everything. This lifestyle was taken by the designers as a basis when developing the project.
The entrance to the tunnel is located above an old chest that has been in this room for a long time. There is nothing easier for a cat than to jump on a chest and then dive into a secret hole.
Laid at the junction of the walls and ceiling, the tunnel forms many so-called viewing platforms, from where the cat can spy on its owners.
Windows, reminiscent of embrasures or portholes, allow the cat to “follow the object” (that is, the owners) from a hiding place.
After circling the room, the tunnel emerges onto the top shelf of a high shelving unit. Fortunately, the shelving unit is also a Because We Can creation, so the designers put a protective fence there in case the cat, having had its fill, falls asleep too close to the edge. The fence is made of aluminum slats and corners with round holes. Both are sold at most hardware stores.
The tunnel body is a waxed cardboard tube that is used for casting concrete products. This cheap material can be easily purchased at a hardware store and cut with a regular jigsaw. The designers cut off the top of the pipe (about a quarter of the diameter) so that the cat can “survey its territory” from above, plus it makes the pipe easier to clean. The designers then painted the outside of the pipe to make it look like it came from an old factory. First they applied a primer, then a layer of silver paint, and finally paint that imitated worn bronze. The inside of the pipe was covered with fabric, which is used for covering acoustic speakers in a car. It has a lot of advantages: it is inexpensive, it is easy to cut and creates the friction necessary for comfortable walking inside a cylindrical surface.
Once you cut off the top of the cardboard tube, it will no longer hold its shape.
To turn it into a cylinder again, it was necessary to make supporting rings, which, like hooks, secured the pipe to the wall. All hooks and rings were cut from plywood. Tip:
We recommend using a stencil to draw the detail on the plywood; All that remains is to cut it out with a jigsaw.
This is what the stencil for the support ring looks like. It was made specifically for this project. Parts 2 cm thick were cut out of plywood.
This is a stencil for cutting out fastening hooks. It was also made from plywood 2 cm thick.
To make the hooks look more textured, it was decided to give them a more interesting shape. These decorative elements were cut from MDF 1.3 cm thick; they were attached to hooks on both sides.
After cutting out the rings, hooks (pictured) and decorative elements, they were coated with primer and painted. This gave the elements a more “industrial” look. If you do not have the opportunity to paint parts with aerosol paint, use a foam roller rather than a brush - this way the paint will go on more evenly. Connect the wood pieces together using blind nuts and round head screws. All that remains is to securely attach the entire structure to the wall: try to find the places where the support beams pass. Attach the structure to them with dowels and screws. If you cannot find beams, use extra strong fasteners such as anchor bolts. If you can’t do it yourself, invite a professional.
As a result, you will get a tunnel that looks like an industrial pipe with a very happy cat walking along it!
Materials:
- Waxed cardboard pipe with a diameter of 30 mm
- Soft felt-type fabric
- Screws with round heads
- Blind nuts
- Glue
- plywood sheet
- Primer
- Silver paint
- Spray silver paint
How to calculate how much rope is needed for a scratching post?
Now let’s remember school mathematics and calculate the amount of rope depending on the length of the pipe. Let’s calculate using my example:
- We measure: Pipe diameter 10 cm.
- We multiply: pipe diameter x pi number - i.e. it turns out 10 x 3.14 = 31.4 cm - this is the length of the rope that will be needed for one circle. Taking into account the thickness of the rope, it turns out a little more (for me it was about 38 cm per 1 turn).
- We calculate: The thickness of my sisal rope is 8 mm. It turns out that for about 10 cm of the length of the pipe - 10 circles of rope, since there are small gaps between the circles of rope (here it all depends on the thickness of the rope you take), i.e. 10 x 38 = 380 cm (3.8 m of rope per 10 cm of pipe length).
- Let's calculate: The length of my pipe is 2.3 m. If we assume that there is 1 circle per 1 cm of pipe length, we get 2.3 m per pipe = 230 circles (if the rope is 6 mm thick, there will be more circles): 38 cm (length of rope for 1 lap) x 230 laps (number of laps of pipe) = 8740 cm = 87.4 m of rope for my entire pipe. It took me about that much sisal rope.
It is better to take a rope with a small reserve!
I wrapped the end of the rope a little with thread to prevent fraying. We screw the end of the rope to the pipe with a screw and begin to wind it. I will say right away that this is not an easy matter. You need to do it together. One holds the pipe, the other pulls it tightly, and this should be done as tightly as possible to the pipe. After every 10-15 laps, be sure to “compact the rope down” with a hammer and screw the rope with a screw (we do this from the side where it will not be visible). If you don't compact the rope properly, it will slide down after a few days.
We invite you to familiarize yourself with: Cheerful baby Kinkaloo is an unusual pet in your home
We attach the corners to which the shelves will be attached to the pipe at the required height, and hide these corners under the rope.
I lined the end of the pipe with fur. When finishing winding the rope, you need to go a little deeper into the fur and secure the rope well with screws.
Step 9. We cut holes in advance for the corners in the shelves and thread the corners that we have on the pipe into them.
Step 10. We secure the pipe well. And enjoy the result!
I made shelves on the wall and the side of the cabinet along its entire height, now the cats have the opportunity to also be on the cabinet. I still had some fur and padding polyester left, so I made a bed and put it on the closet.
Now our cats are exploring their new spaces!
Customer Reviews
Tatyana: “I’ve been planning to buy a tunnel for a cat for two years, but I couldn’t choose everything. Finally bought the Trixie Spieltunnel with sleeves. The cat had already grown beyond the age of a kitten, but immediately showed interest in the toy. He runs in and freaks out inside. Sometimes you have to lure him out of there with treats.”
Sania: “I bought a collapsible S-shaped tunnel for my cats on Aliexpress at a discount for ridiculous money. I have two of them. Now they don’t even need a mistress. They hide there, run after each other, jump out unexpectedly from the windows - they hunt me and each other.”
Vladislav: “Our cat is already an adult. She is 6 years old. They thought that things like tunnels were no longer interesting to her, so they didn’t buy them. Our friends gave us a plush Trixie tunnel, so she sleeps in it and hides in it when there are guests in the house. She never liked noisy companies.”
Tunnels for cats
The production itself is simple. You will need a regular corrugated pipe of large diameter, just enough for your cat to fit inside. Fortunately, manufacturers produce them in different colors, and you can create a fairly pleasant-looking gaming room. Next, the corrugated pipe can be attached using metallized tape to a cardboard box, which cats love as a house. To do this, you need to cut several entrances and exits into the box. In this simple way, you can make a tunnel of any shape and size yourself.
Similar materials
Mouse Lion Scratching Post || cat house
When a cat lives in a house, especially if it is a small apartment, the owners of these cute animals constantly have to deal with their inexhaustible activity, curiosity and desire to explore all accessible and even hard-to-reach places in the human home.
Cognitive games of meowing pets lead to objects flying from shelves, the plaintive meowing of an animal stuck in a closet or behind a sofa, and other destructive consequences, which have long been excellent material for the plot of short animated films.
Fortunately, there is an easy way to avoid the mess that cat play can bring into your home - go to the pet store and buy interactive toys for your furry or non-furry pet, including a cat play tunnel. Tunnels are able to fully satisfy the ineradicable love of these animals for heights, help them cope with the irresistible instinct of the hunter and the craving for research.
What can you make a tunnel for cats from?
I'm interested in what can serve as an internal frame that will hold the round shape of the tunnel.
What ideas will there be?
photos or videos are welcome!
Cats love all kinds of passages, and if there are two or more of them in the house, then even more so. A very large selection of all kinds of tunnels is sold in pet stores. The principle of their manufacture is simple - any fabric is stretched over a frame consisting of several rings made, for example, of plastic.
Another option is a tunnel made of solid materials (wide rings of cardboard covered on the outside and inside with fleecy material).
If you want to make a tunnel with your own hands, here are several options.
1) From ordinary cardboard boxes next to each other.
2) From various plastic pipes, varying in size.
3) From any fabric based on a frame of rings. Even children's pants can be used as a tunnel.
4) On my own behalf, I would like to add that a plastic mesh is suitable for the tunnel, from which several cylinders are made, covering and connecting them with fabric.
Finally, watch a funny video of a cat having fun in such a tunnel.
There are plastic pipes of medium diameter, one pipe can become a good tunnel for cats.
If you need a tunnel with a turn, then you can use a corrugated pipe.
Pipes are expensive and if you don’t have money, then you can simply put together a rectangular tunnel from boards.
It can be made from old five-liter bottles, which can be fastened with thick fabric that will not be torn by claws in the heat of play. You can use raincoat fabric.
As an option, use the entire bottle or even several, or chop it into small pieces, 10 centimeters each, to achieve the effect of sagging fabric, for additional interest of the animal.
An unexpected treat will be a sleeve, a branch to the side, which is best made looser so that the animal can turn around in the opposite direction.
You can also use tubes from building materials. Rolls of linoleum or carpet hang on them. Their radius is different.
Plastic pipes intended for sewage are also suitable.
Why is this necessary?
Throughout their “evolutionary life,” these animals seek shelter in order to feel protected from large predators. In an open area, a cat is practically unable to relax and fully rest - to do this, it needs to hide in a safe place. Of course, our pets do not experience such constant stress; they are able to sit comfortably in a chair, on the kitchen table, and even on their owner’s head. However, they sometimes get nervous, not finding a quiet place where they could hide from troubles and wait out some time. A tunnel for a cat is simply necessary, especially if the animal has a shy character or has just arrived in the house.
Wild cats need shelter not only for protection from predators, but also for hunting. A pet, no matter how lazy it may be, is also a hunter. And deep down, each of them dreams of catching valuable prey. If there are no suitable objects for this, the owner’s feet are used as they pass by the cat sitting in ambush.
Pets rarely walk outside, so they don’t move enough, which can harm the animal’s health. Boxes, cabinets, tunnels are objects that help maintain the required level of activity for the cat.
Necessity or game?
Cats love to hide under chairs, behind the TV, on the closet, and even in bags and boxes. We habitually believe that a pet is simply playing with us, splashing out its natural energy. However, in fact, this is not a joke at all; hiding in dark corners, the animal realizes its hunting instincts within the framework of the means available to it. It is in order to give the pet the opportunity to fully satisfy the needs of life that a cat tunnel is needed in the house.
Covering tunnels with carpet
The next stage is to cover the tunnels with carpet. We chose a gray shade. It matched perfectly with the color of our cat's coat. Buy a covering measuring 3 m x 6 m, because you need to cover two 60 cm long tunnels from the inside and outside. If you don't want to cover the inside, you can simply buy a 3m x 3m to cover just the outside of the pipes. We decided that it would be better to have leftovers than not have enough material to create such wonderful houses for our cat.
We chose a natural fiber carpet. It cost much more than synthetic in the store, but there was nowhere to go. I didn't want to constantly clean our pet's houses. With natural carpet there will never be any problems with cleaning, I guarantee you that. Loop natural carpet does not accumulate pet hair like other types of pile. Moreover, it will be convenient for the cat to sharpen its claws on it.
Only on a soft spot: Russian Domostroy forbade punishing children in any other way
Smooth armpits without shaving: ways to remove hair using conventional products
Paralympian Talay without arms and legs: “the harder the fight, the greater the victory”
We place the tube in the middle of a 120 cm x 150 cm piece of material so that the sections wrap around it. Leave two and a half centimeters at the ends. This is necessary so that the edges of the tunnel are also completely covered with carpet and are not visible. Wrap the carpet around the pipe and make sure it completely covers its circumference.
We make several marks along the carpet, 2.5 cm more than where it overlaps. We cut the carpet so that it completely covers the pipe with a slight overlap. We apply liquid nails to the back of the carpet only where the carpet backing touches the pipe. We start along the first end of the pipe. We use liquid nails. Do not spare them, because the carpet must fit tightly and securely to the tunnel. Then we apply liquid nails along the pipe until we reach the second end. We cut off the carpet remnants. Glue the seams. It is necessary for the structure to dry for 2-3 hours.
In order to proceed to the next step, you need to place the tunnel on the table. We find the place where the two seams meet, measure about 15 cm and cut the carpet into strips. We apply liquid nails to the strip, stretch it and pull the carpet into the pipe.
A broken nail is no problem: tips for treating nails at home
Seven daily habits of happy people
The newlyweds traveled all over the world and took wedding photos in every country
We cut another strip and apply liquid nails, pull and pull the carpet into a pipe, align the edges with the first strip that we glued. We continue to follow the same pattern until we reach the last strip. We will have to cut this strip along the edges to match the first and last strip we glued. We turn the pipe over and do the same on the other side. If there are any gaps, you can take the carpet scraps and glue them inside.
Tunnel - Safe Haven
Where do owners find their pets: in suitcases, on the shelves of wardrobes, under the bathtub, beds, in shoe boxes. Very often, animals choose completely unsafe places. They get into bags and packages, into an open oven (especially if it is warm), into a microwave oven or into a washing machine. Cats have a natural need for warmth and protection, and their instinct constantly tells them to be vigilant while sleeping.
To prevent your pet from being tempted to hide in the wrong place, it is better to provide it with a safe, secluded cat house, where it can curl up and take a quiet nap. Pet stores offer an endless variety of sleeping places and cat shelters: beds, houses, tunnels. Making a house yourself is quite difficult. It's better to buy it. You can make a bed with your own hands.
How to choose a play tunnel for a cat
Pet stores offer several design options, but the best option for this toy is, of course, a multi-level model that has a composite design that allows it to be easily transformed.
When purchasing, it is important to pay attention to its size. It is better to choose a play tunnel consisting of at least five parts; in this case, you can not only assemble a toy that does not interfere with people, but also fully satisfy the play needs of the animal. The material must be durable and pleasant to the touch. Particular attention should be paid to the strength of the material when purchasing a vertical tunnel, along which the animal will certainly climb, climbing up and releasing its sharp claws.
What is the structure?
There are 2 types of play tunnels for cats:
- vertical;
- horizontal.
The first have the advantage that they take up little space and enable four-legged animals to realize their natural instincts - to climb to heights. On the “floors” of the wall structure there are toys that the fluffy will enjoy spending time with. The second option combines 2 things that minke whales love - play and several places to rest. Labyrinths can have many branches for travel.
