origami cat made of paper
Do you want to have a fluffy cat, but your dream is being dashed by many problems? There is an ideal solution, make a cat out of paper , it’s quite simple, so anyone can have a pet friend. Making an origami cat may be a little more difficult, but there are step-by-step photos and instructions for this, which are presented here.
Everyone loves cats, for the most part. More precisely, everyone loves kittens. No one can resist the cuteness of a little kitten, especially children, so paper kittens and paper cat crafts are an ideal project for kids. Here you will find several simple examples of master classes of such crafts with step-by-step photos.
What will you need?
You need to find patterns, fabric (it’s best to take natural, hypoallergenic, especially if the child will have the toy), threads (choose to match the color of the fabric). You can purchase all this in special stores.
However, you should first look around at home; you will probably find something useful in your bins.
You will also need needles and safety pins (to help you connect the parts before sewing them together).Remember about the stuffing (sintepon, for example), you can add aromatic herbs and sawdust inside.
The choice of filler directly depends on the purpose of the toy. Don't forget about decorations, bright beads, satin ribbons, bows and so on.
Try not to be limited in your choice of fabric, look for bright, colorful, unusual colors so that the craft reflects your personality.
To decide a little about what you want, you should look at a photo of a hand-sewn cat on the Internet.
Note!
- How to make wooden shelves with your own hands - original design options
Kinusaiga technique for beginners: what is it, a description of creating paintings from threads
How to weave a figurine from rubber bands: how to learn to weave animals, toys and what you can make from rubber bands on a slingshot
Many will now ask the question, where can I find patterns? Try searching in a search engine, on special forums or on social networks. We are sure that you will easily cope with this task, since finding them will not be difficult!
By the way! Even if you are a beginner, you do not have to go to a master class on sewing a cat with your own hands, since now we will give simple instructions for this.Sew a toy
- It is necessary to prepare the fabric for further use (for example, iron it).
- The found patterns must be transferred to paper and cut out.
- Next, the pattern needs to be transferred to the fabric using chalk or a bar of soap (it is better not to use pencils or markers, as they may not come out of the fabric later).
- We cut out the parts and stitch them by hand.
- If necessary, turn and stuff.
- It remains to add small elements. For example, an eye, a mouth. You can also further decorate using bows, ribbons, and beads.
You can sew clothes for this toy to make it even more creative and unusual. By the way, you can make several sets of clothes, which will make the game even more exciting for your child.
Some fun facts
- The black look is redrawn from the game's real animal creator.
- Kittens are so far the only baby animals that are created without player influence and have normal model proportions.
- In game version 1.2.05a, the animal begins to move behind the player if he has a fish in his hands.
- You cannot feed a cat fried fish.
- If you tamed a cat under one login, and then entered the game under another, the pet will disappear.
- If you restart the game and the cat is far away from you at that time, it will disappear.
- If the cat has been sitting in one place for a very long time, then you will not be able to pick it up.
Crafts for Beginners
Let's present a list of cat craft ideas for your children that they can easily handle. Since creativity occupies a very important place in the development of children, these crafts are clearly suitable for them; they develop thinking and imagination.
CD cat
The first option for our furry friend is a portrait on DVD. To make it, prepare a disk, a marker, glue and double-sided tape, corrugated and colored paper, and scissors.
Creation instructions:
First, make a black circle out of paper, its size will be slightly larger than the circle of the disk. It will replace the cat's nose; stick it in the center of the disk. We cut out the eyes and ears from beautiful paper; the shape and color will depend on you. You can make it up, or you can compare it with a photograph or picture.
Use glue to connect the disk to the eyes and ears; you can also make a beautiful butterfly with ribbon or paper. The cat will turn out funny and respectable.
Picture of puff pastry
The craft will delight you with its presence on the wall of your home; it is a way to complement the interior. The creative process cannot but delight a person, especially when the result of the work exceeds all expectations. You will need a stationery knife, a cat figure template, foil, a frame, beads and ribbons, acrylic paints and puff pastry (water, salt, flour).
Step by step creation.
We take a ready-made cat template, you can draw it yourself, or you can take a ready-made one from the Internet. The dough must be kneaded from salt, flour and water in a ratio of 1:1:1. Water is added to ensure that the dough is not too sticky. This consistency will make the mixture suitable for use and creation of a work.
Roll out the dough into a flat cake, apply a stencil, and use a knife to cut out a shape. To prevent the dough from sticking to the table or fabric, it is best to use foil as a mat.
Three to four hours are enough for the test composition to dry, after which it becomes hard and the edges of the figure must be sanded with sandpaper. Using a thin marker, draw a picture of the desired cat, and then use any paint to paint the craft. While painting, your mood will only improve, and the process will bring pleasure.
The background can be drawn on cardboard and made absolutely anything you want. Glue the dough craft on top of the cardboard, and place the frame over the entire picture.
You can add decoration using beads or ribbons, tie bows and knots. For the best effect, it is necessary to coat the work with varnish and dry it.
Felt cat
To make felt crafts, you need to prepare felt, glue, padding polyester, pencil and paper, beads and threads, and scissors. Using a template or your own efforts, draw the outline of the future work onto felt from paper. It will be most convenient to use needles or pins to connect paper and fabric.
The parts of the cat need to be made separately, as well as its two sides: front and back. Using a knife or scissors, cut out the parts along the contour. We decorate the muzzle with button eyes, the nose and mouth with multi-colored threads.
We connect the parts to each other, sew the tail, head and paws into place. During sewing, we fill the parts with padding polyester, adding volume and airiness. You need to use an overcast seam, it will look beautiful. At your request, you can add decoration details: scarves, ribbons, bows, butterflies, ties.
Paper cat
Well, what about paper art, an excellent material for creating your four-legged friend. You can easily find a use for such a miracle, for example, a desktop or a bedside table. To make it, prepare cardboard (black, green), yellow paper, marker, glue and scissors.
And now the actual process of creating a cat. Take black cardboard and fold it in half, and cut along the fold line with a knife. We bend one of the parts in half again and cut out a semicircle, we get the body of a cat.
We make toes with claws on the paws, bending them, and glue them onto a cardboard base. The green cardstock will serve as our grass base. For the tail, an incision is made in the back of the cat's body.
The other cardboard piece is folded in half and will become the base for the head. We round the edges and make cuts on it for the ears, and connect the head with glue to the body. Yellow paper is suitable for cat eyes, on which we draw the pupils with a marker. We draw the antennae and cut them out, gluing all the details to the cat’s face. Insert a cardboard tail into the cut in the back. Now your wonderful work can be placed on a cabinet, wall, table or bedside table.
We have presented you with a list of ideas and materials for creating everyone’s favorite cats that will delight you with their presence. The processes of creating such works themselves are quite easy, and the resulting crafts become a wonderful work. They can be used for your decoration and for a handmade gift.
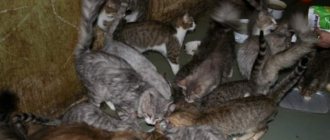
We are engaged in breeding cats
If you decide to have several pets, then two individuals will be enough for you to start with - in the future you will be able to breed them. To get a new cat, you need two individuals and a fish. Place them side by side and right-click on both while holding a raw fish in your hands. If you did everything correctly, you will get kittens. To give your kitten a specific color and appearance, you need to first feed the cat the color you want. To breed again you need to wait about five minutes, after this time the cats will be able to breed again.
Other interesting options for making cats
Many people want to learn how to make something beautiful out of paper, we invite you to get inspired by interesting options for making cats.
You don't have to create appliques or use origami, check out the quilling technique.
Before making such a paper cat, prepare:
- strips for quilling work (width no more than five millimeters);
- tweezers;
- quilling stick;
- scissors;
- PVA;
- a nice base to work with.
Now we work following the steps:
- We make turns. The cat's head will require five turns, and the body six. The latter should be slightly elongated.
- Based on this we make a sketch of the future cat. We transfer the made turns to the base and glue them onto PVA.
- Making ears. They need to be twisted in the form of drops. We make regular turns, glue them together, and carefully flatten the top with your fingers. The same principle is used to make cat paws. We glue all the resulting parts to the previously prepared base.
- A cat cannot be left without a whisker. They need to be made from thin straight strips. We wind them onto a stick, straighten them slightly and glue them in the muzzle area. The same instructions are suitable for making a tail.
Now you know how to make such a cat out of paper. With a little practice, the finished products can be framed and hung on the walls. Improved compositions can even be presented as a gift.
Cats can not only decorate your interior, but also your favorite book. To do this, just learn how to make a cat bookmark out of paper. We described the manufacturing principle in detail in one of our articles about bookmarks.
In what other form can paper cats be presented?