04.11.2019 Pet supplies Share
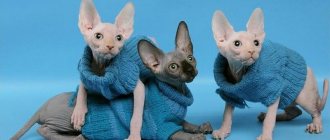
Does a cat need clothes? Yes, definitely! We offer to sew clothes for a cat using a universal pattern. Using it, taking into account the individual size of your cat, you can sew or knit any item for it. Many cats need clothing, because not all breeds have thick fur; many do not have it (Cornish Rex, Canadian Sphynx, Don Sphynx, etc.). If the apartment is cold and the cat (with fur) is freezing and climbs into your arms, then you need to sew clothes for the cat.
To make your cat like clothes, animal psychologists advise:
- Start accustoming your cat to clothes at an early age.
- You need to be patient, cats don’t immediately get used to clothes.
- Reward your cat with affection or a tasty treat for the courage shown in trying on and wearing an outfit.
- Cat clothes should not be worn every day; cats do not like stiffness in their movements.
Idea for a simple DIY cat clothing pattern
This is the easiest DIY cat clothing option that does not require any special professional sewing skills. It’s easy to make such a sweater; you don’t need to go to a fabric boutique and buy material, you just need to take a large pant leg or sock. You don't need a pattern for this outfit.
Step 1. Take a blank - a trouser leg or a wide sock. Use chalk to measure the holes for the paws. Ready! All that remains is to cut out the holes using small scissors.
Step 2. To prevent the sleeves from looking untidy, carefully mark them with a needle and thread. The clothing does not require fastenings, jewelry or other accessories. You can safely put the jacket on your pet.
When developing a sketch or pattern, remember: it is necessary to arrange the parts in such a way that the cat has the opportunity to breathe freely and move confidently. Forget about sharp and piercing jewelry - the cat can remove, chew or accidentally swallow them.
Cute vest for a cat
To create this cat clothing pattern, you need to know the cat's neck circumference, back length, bottom circumference, and the length between the legs. If you want to use clasps, leave a small allowance for them.
Step 1. Mark the neck circumference measurement on a white sheet, but not with a straight line, but with a slightly rounded line. Exactly in the middle, draw a vertical line equal to the length along the back. The bottom part of the picture is the bottom of the product, its value is equal to the circumference of the cat’s lower body. Divide the “distance between the paws” parameter by 2, the resulting figure is the line to the beginning of the holes for the paws (on both sides of the vertical line). The dimensions of the vertical length of the vest depend on how long you want to give the product.
Step 2. Transfer the data to the selected fabric by attaching the pattern to it. Cut the resulting blank with scissors, then sew the product by connecting two opposite sides AB and CD. Cut out the piece, leaving a little space for the seam, then cut out the armhole for the paws, then hem or border the edges of the piece.
Costume creation process
After the template has been selected, the owner will have the most important part of the work - transferring the patterns to the fabric, cutting and basting the blanks. To begin with, the master will need to cut out a template from paper, and then, using chalk and pins, transfer it to fabric
At this stage, it is important to leave allowances for the seams and pay attention to all the details, because otherwise the sewn costume will not fit your pet
After transferring the template to the fabric, you should cut the blanks. To do this, it is better to use special scissors that have sharp blades and guarantee a neat, even cut. When the blanks are cut out, the basting stage awaits. It's better to start from the wrong side. The sequence of basting the blanks must be carried out in accordance with the requirements of the patterns.
After the rough basting, having made sure that the actions performed were correct, the pet owner can sit down at the sewing machine and sew down the parts for finishing. It is recommended to grind down the largest parts first, and fasteners, buttons and eyelets should be sewn on last.
https://delaemrukami.boltai.com/topics/vykrojki-kombinezonov-dlya-domashnih-lyubimtsev/https://zverki.click/koshki/uhod-koshki/odezhda-dlya-lyubimyh-kotov-i-koshek-svoimi- rukami.htmlhttps://mechtakoshki.ru/uhod-i-soderzhanie-koshek/predmety-dlya-kormleniya-i-progulki/odezhda-dlya-koshek-svoimi-rukami-poisk-vykrojki-i-poshiv-kostyuma
Overalls for a cat
For this model you will need only one measurement - the length of the back (2 measurements, AB in the picture) Do not forget to try the product on the cat from time to time as you sew, adjusting the measurements to the width and length. Leave a little free space along the bottom of the legs into which to insert an elastic band.
Step 1. Draw a line on whatman paper equal to the length of the cat's back. Divide this value by eight - it will be the edge of the grid square on which you build your pattern. For example: the length of the animal’s back is 20, which means that squares must be built with sides of 2.5 centimeters. Outline the mesh, then carefully, according to the cells, transfer the outlines of the pattern from the drawing. The pattern should consist of several parts, the largest of which are the right and left sides, and the small one is a wedge that will be located on the chest and stomach (it must be sewn between the front legs).
Step 2. The overalls must be sewn in layers - for the upper part you can use low-maintenance raincoat fabric, for the lining take soft fleece or flannel. If you want, diversify the model with a hood - this will completely prevent your cat from getting wet when walking in the rain.
It is advisable to make the fastener on the upper back. This way the cat won’t be able to damage your hands when trying it on and won’t tear the zipper while wearing it.
How to take measurements?
The first thing you need to do is arm yourself with a measuring tape. The next task is more difficult - to ensure that the cat stands calmly during the measurement process. To do this, you need at least two people whom she would trust unconditionally. The first one will perform a distracting function, i.e. pet and give treats, and the second one takes measurements. The main measurements are:
- neck circumference (in the thickest place);
- back length (from the withers to the base of the tail);
- chest circumference (measured just behind the front legs).
These measurements are enough to create patterns for basic cat clothing. Knowing the standard parameters, it’s easy to sew a blanket or sleeveless vest. For more complex suits, additional measurements will be required. When sewing a jumpsuit with a hood, you need to know the distance from the base of the cat's neck to its eyes, as well as the circumference of the head. And when creating a spectacular dress for an exhibition, you need to measure the circumference of the abdomen, which is measured in front of the hind legs.
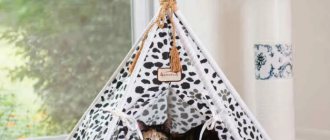
Bros
All measurements should be taken with one centimeter tape. Seam allowances are usually not left; it is enough that the centimeter is in a free position when taking measurements. However, if the pet has long hair, then it is better to provide a small supply of fabric, since close contact of clothing with the fur can cause discomfort.
Comfortable and stylish pajamas
Cats are heat-loving animals, especially if you have a Sphynx living in your apartment. Pets with smooth coats require special attention, so comfortable pajamas are the ideal solution for caring for your four-legged animal. For this pattern of clothing for cats, any soft fabric, such as flannel, fleece or jersey, is suitable; it is better to use waterproof options. This option is printed on A4 sheets or applied independently to whatman paper.
Step 1. This model consists of several parts. Part 1 – back (GZ), the value is equal to the length of the cat’s back; you can also place a fastener along this line (for this you need to leave an allowance of two to three centimeters). Detail 2 (IZ) – belly measurement, folded along the IZ line.
Step 2. Place the pieces together and sew. The lines AG, BV, VD, DE are sewn together, the rest remain free (AB and EZh are the paws). The ZhZ line also needs to be sewn, but leave a small hole for the tail. When the work is ready, sew on a zipper if desired.
Some tips for sewing: make the seams overlap, using a zig-zag stitch, in this case they will be softer and will not disturb your cat. The lower edges of the paws and throat can be supplemented with a pre-prepared knitted ribbon. If the pajamas are made from fleece, the fabric does not need to be improved in this way.
Model description
Lightweight vest for girls made of jersey and fleece, lined, zipped, with a hood, kangaroo pockets and an appliqué on the back.
The vest consists of three types of fabric:
- shelves and hood made of woolen jersey;
- viscose jersey lining;
- fleece back.
This vest is very warm, and at the same time does not increase the volume. In winter it can be worn under a jacket, in autumn or spring with a warm jacket, in summer with a blouse or top. All fabrics are of high quality, namely on the shelves and the hood are natural, which eliminates allergies. Read more about the properties of natural fabrics here.
Why is the shelf and hood lined? The bright lining in a children's vest serves not only for the sake of beauty, but also for convenience. The knitwear on the shelves and hood consists of wool fiber; such fabric is itchy and unpleasant to the body. To avoid the discomfort of children's delicate skin, I decided to make a lining from thin knitwear.
This way the vest will keep your body warm and comfortable. In addition, the thickness of the shelves will be equal to the back, since fleece is much denser. You can learn about the properties of fleece fabric from my master class: how to sew a sports jacket.
I did not put a lining on the back, this will create additional thickening. The softness of unlined fleece provides a pleasant, comfortable feeling. By the way, not a penny was spent on the vest; all the fabric was left over from sewing the cardigan, tunic and hat.
I was lucky, the lightning also turned out to be from leftovers. Let me tell you a little secret: when I have excess zipper, I don’t throw it away. I just select the desired slider number, and voila, the new zipper is ready.
Cute summer t-shirt
In the summer, a beautiful, stylish T-shirt will be ideal for your smooth-haired cat - but this model is most suitable for sphinxes, whose skin needs to be protected from direct sunlight. How to make a T-shirt for a cat with your own hands? First, prepare a light fabric, use knitted options. Draw the diagram yourself or print it out, cut it out and draw it onto fabric. Then proceed according to the instructions:
Step 1. As in the previous version, the GZ line is the length of the cat’s back. Fold the back (part 1) in two layers, cut it out, bending along the dotted line. Remember that the product should not interfere with the animal’s movement - if the cat is well-fed, make the pattern a little wider. Also cut out the belly (part 2) with a fold along the IZ line.
Step 2. Place the two parts together and sew along the lines BVD, AG. Use a zig zag stitch. Leave the lower part of the product, as well as the sleeves and neckline as is, but if necessary, the lower part and sleeves can be hemmed.
Dress for a cat: we make an outfit with our own hands
To participate in exhibitions, tailed pets are well suited for a fashionable dress that can be created at home. This dress can be sewn using a standard pattern. Choose any soft-feeling fabric, the size of which should depend on the size of the cat itself.
Step 1. For the pattern you will need the length of the cat's back. Divide this parameter by ten - the resulting figure will be equal to the size of the cell. For example, with a back length of 20 centimeters, you will get a square with sides of 2 centimeters. Make a line on a piece of paper, place the sides and bottom there (as shown in the picture). Take into account all the edges and carefully count the number of squares so as not to make a mistake.
Step 2. You should have three parts - two sides and a bottom. Cut out the sides and bottom, then sew them together. The incision is present only on the upper part, which is located on the neck.
Step 3. Sew on a beautiful decorative button if you want to further decorate the dress.
Don't make the dress too tight, especially if the fabric is non-stretchy. Also, the animal may become confused in its movements if the dress is too loose. You should not think about making a dress that is too fluffy - such options are only suitable for holidays or exhibitions, during which the cat will not be able to move, but will sit in one place.
When making a holiday suit, you can sew it from a new beautiful fabric, and for daily wear you can use an outfit from old things. Your cat will find it easier to accept things that smell familiar.
Clothing patterns for cats: 5 important tips
- Try to accustom your animal to clothes from a very early age. Not all cats will be happy with a new piece of clothing - be patient to get your pet accustomed to the clothes. During fitting, reward your cat with affection and tasty treats, this will allow her to quickly get used to the new outfit.
- Make models on paper in real size - in this case, the parts can be easily attached to the fabric and made into a pattern.
- Accessories - all kinds of zippers, elastic bands and decorations are sewn on at the final stage of sewing, after trying on the animal.
- A cat cannot be dressed up every day, especially when it comes to clothes made of wool - it will start licking clothes, which can be harmful to health. Particularly sensitive pets may experience stress from being in unusual clothes for a long time.
- Do not force your cat to take part in taking measurements and trying on clothes - if she is not in the mood, you are unlikely to be able to create clothes that will suit your pet in all respects. Be patient and try to persuade the harmful pet to try it on next time.
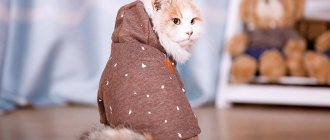
Little orange sun 
Video “Clothes for cats”
This video shows how to sew a cute T-shirt for a cat with your own hands using a cat clothing pattern, and also gives useful practical tips for sewing it yourself.
Many owners from time to time dress up their beloved cats in a variety of cute and practical clothes. Cats in cool clothes are the new rage. You can create clothes for a cat yourself - it’s easy, interesting and doesn’t require financial expenses that hit your wallet. You can do this using your favorite clothing pattern for cats from the article.
Together with your pet, you can realize the most unusual ideas and ideas, and also turn creating clothes into a real hobby!
To sew a vest, you need to prepare the following materials:
- - textile
- - lining
- - snaps or buttons
- - scissors
- - chalk
- - threads
It is better to choose fabric from the costume group, with the addition of natural fibers (wool, linen). A brightly colored lining will look interesting.
The procedure for sewing a vest:
1. Before cutting, the fabric must be washed and ironed so that the finished product does not shrink or fade.
2. Print the pattern, enlarging it to the desired size, or transfer it from the pattern sheet Burda No. 5 2010, model 143
3. Fold the fabric right side inward and trace the pattern with chalk. We cut out the parts with allowances of 0.7 - 1 cm on all sides. It turns out 1 back part (one-piece back), 2 shelf parts. We cut out the same details from lining fabric. For the leaf, we cut out two strips of fabric 9cm long, 5cm wide plus allowances.
4. Fold the piece of paper right side inward and sew down the short edges, cutting off the corners next to the stitching.
5. Turn the leaf inside out and iron it.
6. On the shelves, mark the location of the pocket, place a piece of paper on top and stitch it in place; the stitching line should coincide with the line where the pocket is located.
7. We bend the leaf and secure its sides with a stitch 2-3 mm from the edges, iron it.
8. Fold the shelf and back with the right sides inward and stitch the shoulder sections at a distance of 0.7-1 cm. We also stitch the shoulder sections on the lining.
9. Finish the vest with lining. We fold the lining and vest with the right sides inward, matching the shoulder seams, fasten with pins and stitch along all sides except the side ones. In rounded places we cut the allowances with scissors.
10. Turn the vest right side out through the side cuts and straighten the corners.
11. Processing of side cuts. In order to stitch the side sections, we reach into one of them and pull them out. We sew the side sections together with the lining. On the other side we sew down the side cuts as much as possible, leaving the hole in the lining unsewn. Sew up the hole in the lining by hand.
12. We sweep the vest along all the seams, forming a small edging from the main fabric, bend it towards the lining, and iron the basted seams.
13. We install buttons on the sides using a press, or you can sew buttons and punch out loops.
14. Iron the vest and remove the basting threads.
You can sew trousers paired with a vest using this master class.
A vest is a wonderful and versatile garment in every sense. Making your own vest for a girl is a great idea! This master class will tell you step by step about a children's vest made of knitwear and fleece. As a result, you will quickly get a fashionable vest with your own hands, softly lined, with an applique and a hood. Sew an exclusive vest for your child, you will give irreplaceable warmth, care and attention.
You will need:
- Thick knitwear – 50.0 cm.
- Thin knitwear – 50.0 cm.
- Fleece fabric – 50.0 cm.
- Zipper – 40.0 cm.
- Threads – 1 piece in the color of the fabric, 1 contrasting thread.
- Tailor's pins.
- Sewing machine.
- Overlock.
- Needle for superstretch knitwear No. 70-75.
- Cord 50.0 - 60.0 cm.
- End caps for cord 2 pcs.